Table of Contents
What is Sales Assessment?
Creating Risk Assessment using Zomentum Templates
Creating Customer Risk Matrix
Creating the Ultimate Risk Assessment Report
How to import and export issues in Sales Assessment?
What is Sales Assessment?
Sales assessment helps MSP’s to Identify and evaluate hazards and risk factors that have the potential to cause harm to their customers. Performing an assessment can provide a detailed analysis of how to control these risks. The process that needs to be followed to resolve the issue is :
Identify the risk universe
Determine the risk criteria
Assess the risks and prioritize
Suggest recommendations to fix the issues (Provided by the Sales Team)
Creating a Sales Assessment with Zomentum
The Sales Assessment Report in Zomentum consists of three components that will help your customers have a detailed understanding of the potential risk and how they can be mitigated.
To start off, you might refer to our Sales Assessment Template or else you could start with a 'New Document' and add the necessary blocks.
Navigate to the ‘Documents’ module from the left-hand menu
Click on Add Documents and select the document type as Sales Assessment
Select the ‘Sales Assessment Report’ Template under the ‘Global Templates’ section or choose your own template if you already have one uploaded.
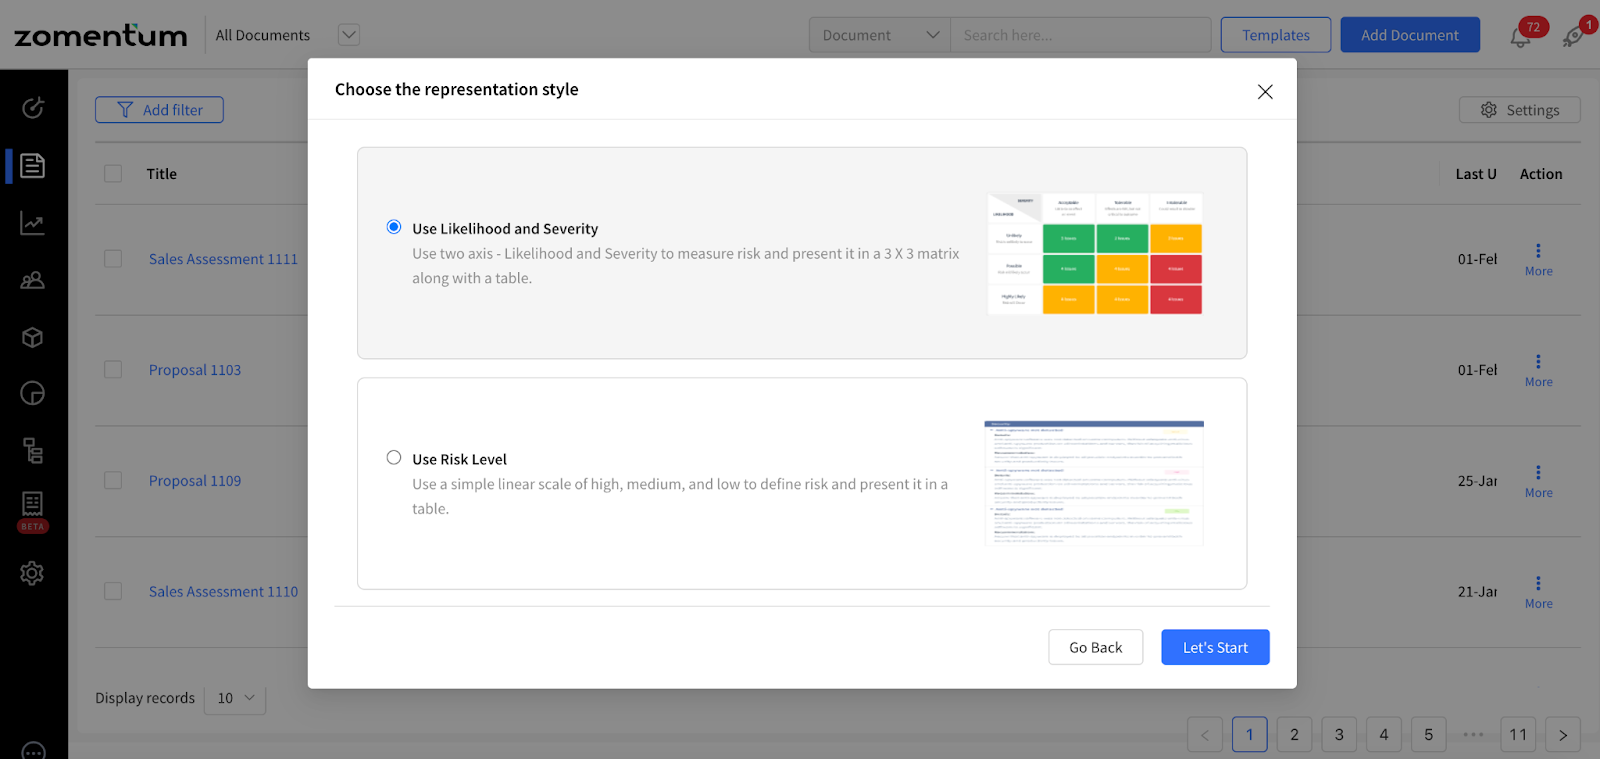
You get two options:
A. Use likelihood and severity
B. Use Risk Level
If you select the first option, you get both matrix and risk level. If you select the second option, you do not get the matrix added to the assessment.
A. Use Likelihood and Severity - Use the two-axis - Likelihood and Severity to measure risk and present it in a 3 X 3 matrix along with a table.
B. Use Risk Level - Use a simple linear scale of high, medium, and low to define risk and present it in a table.
We provide this option when creating a document under sales assessment.Step1: Risk Identification Matrix – the process of detecting, categorising, and characterizing issues faced by customers along with the recommendations. The 3*3 matrix template helps customers to prioritize the issues identified.
Adding a Category/Issue in Risk Matrix: Add New > edit the issue characteristics > Save Issue
Title: add the title of the Issue, as you want it to appear in the Risk ReportCategory: helps to categorise issues by various types such as Infrastructure, Disaster Management, Security, managed service etc.
Severity (Impact): scale the degree of consequence that could be faced by the customer if the issue is not resolved. (Severity: Acceptable, Tolerable, Intolerable)Likelihood (the level of possibility): helps the MSP’s to scale the probability of the risks and consequences that the customer might have to face if the issue is unresolved. (Unlikely, Possible, Highly Likely)
Description: a user can drill down on the details by describing the issue for the customer.
Recommendation: suggest a suitable solution to the issues described in the description. This will help your clients to make better decisions regarding the issues faced by them.
Step 2: Risk Score - Show the seriousness of the risk that the customer is facing on a scale of 100.
The Risk score is a calculated number (score) that reflects the severity of a risk due to some factors. Typically, the project risk scores are calculated by multiplying likelihood and severity, though other factors such as weighting may also be part of the calculation.
Weight Score of each cell **= Weightage for each cell in matrix * Number of issues in each cell (on a scale of 100)The Risk Scoring Method: An MSP who wants to rate the risk of their users, will find this Risk assessment matrix as a tool to create a score on the basis of weightage and number of issues in the cells.
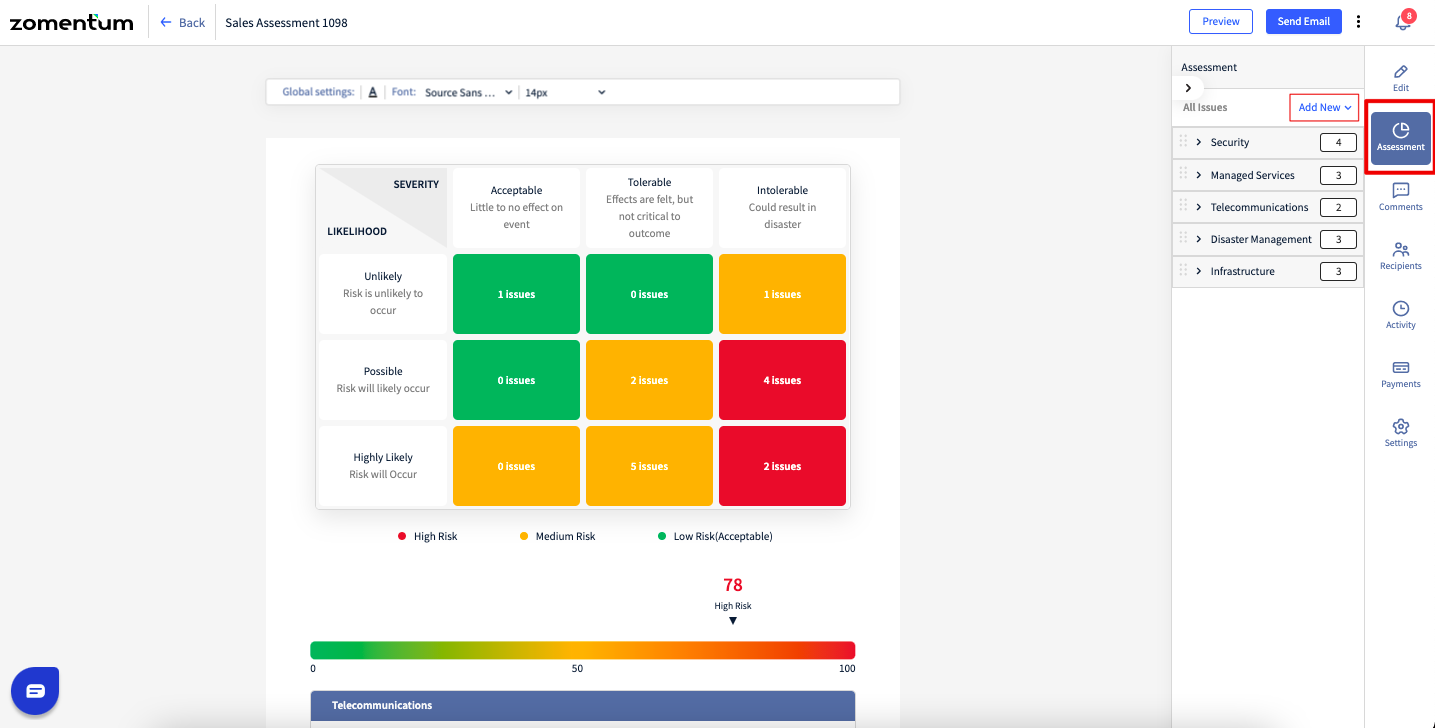

Risk Assessment Matrix (based on sample use-case)
Step 3: Risk Details - The best way to help your customers win against these risks is to walk them through your recommendation for each potential risk they might face. This can be found in the ‘Risk Details’ section.

Once the Assessment matrix and Risk Details are created, the next step is to recommend products and services to your client to mitigate the high-risk concerns.
For example, you can drag and drop the ‘Quote-Block’ to add products against some of the recommendations for the issues mentioned in the report.
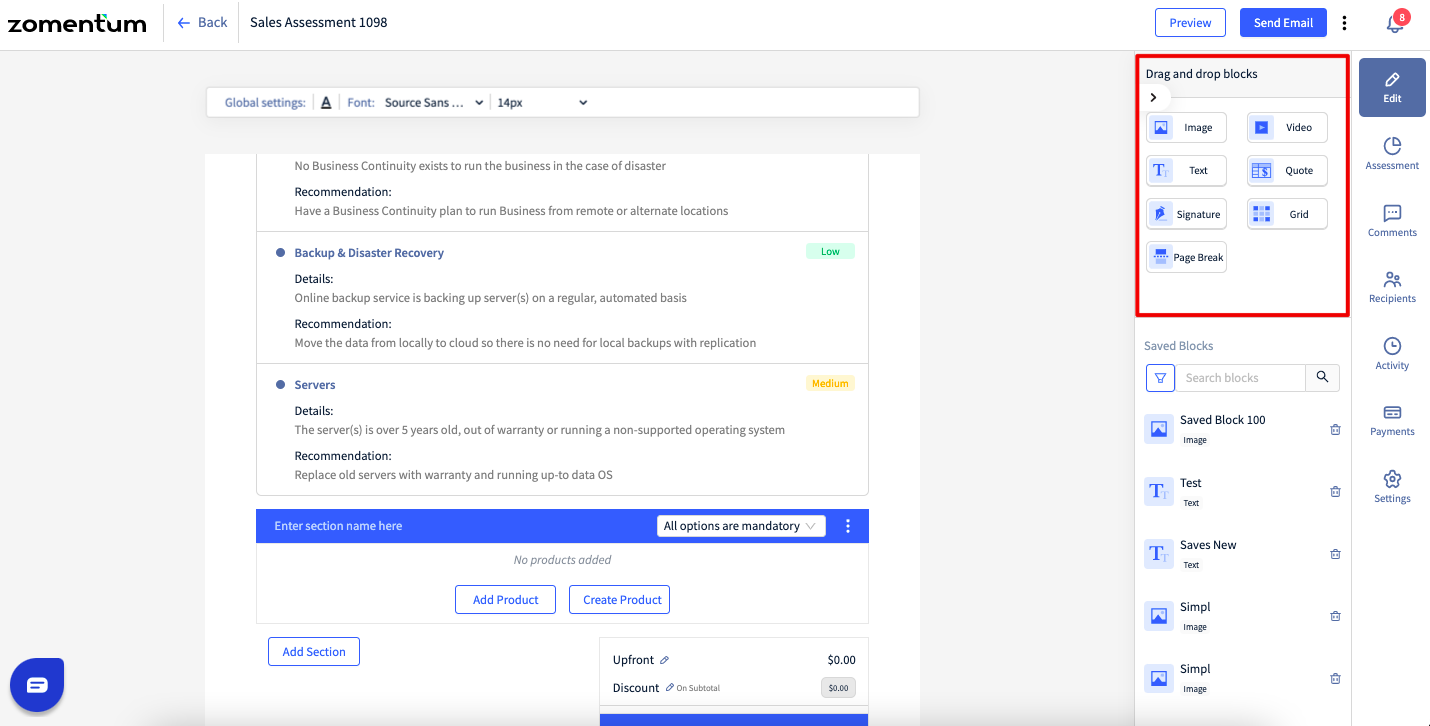
Click here to learn more about Blocks in Zomentum.
Editing your Risk Assessment Matrix from Document Builder
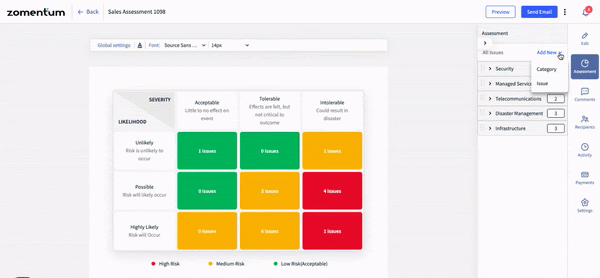
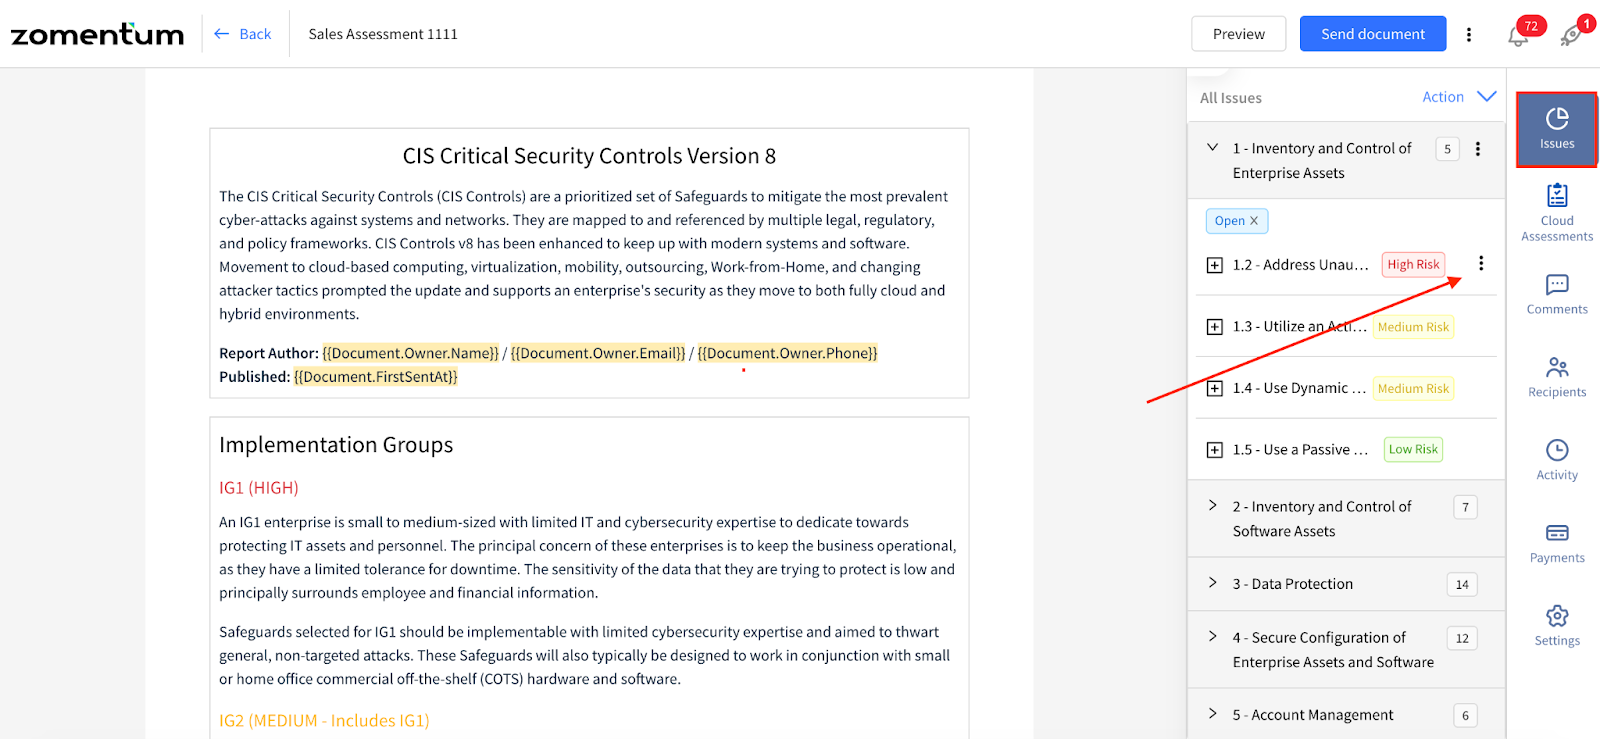
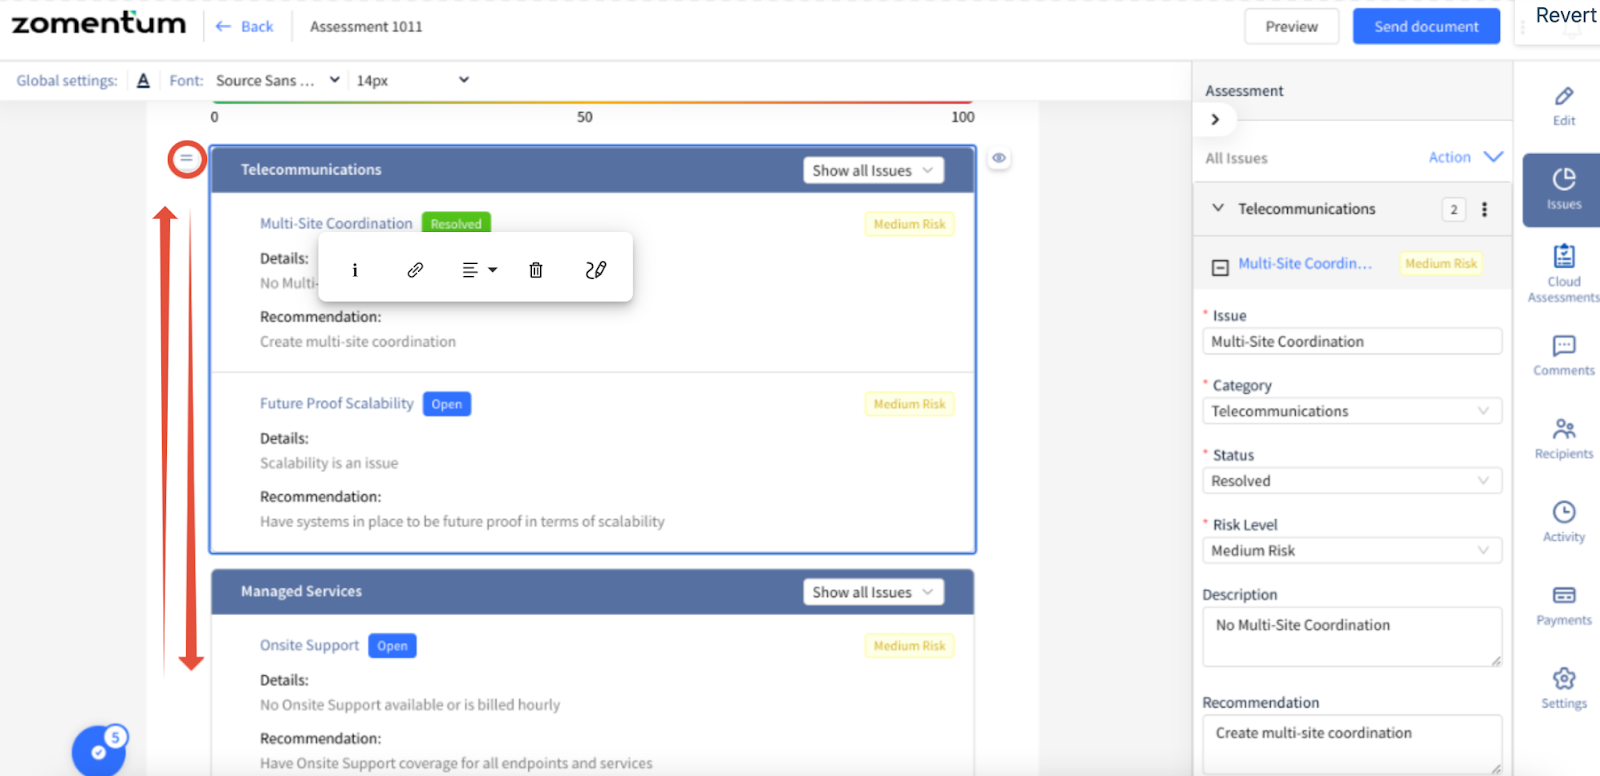
The ‘Assessment’ tab on the right-hand side of the document builder will give you the ability to edit the category and issues logged in the Sales Assessment report.

>>We have the option to edit the Status of the issues under the main categories.
Navigate to Issues in the document > open the issues > hover your mouse over the categories and the three dots option will come up > Edit issue.
The various types of Statuses are open, resolved and unresolved.
Open: If the issues are going on and the team is working on it.
Resolved: If the issue has been given a resolution.
Unresolved: if the issue is yet to be given a resolution.
>>Status filters are available in the Categories to filter out issues
We have the option to apply filters under categories to filter out issues with a particular status. To use this, Select the categories > hit on the three-dot option > Filter on status.
We can filter it out as open, resolved, unresolved, and show all issues.
Say I select resolved and hit apply, the resolved issue will be filtered and displayed.
>>Status filters are available also in the tables
We have the option to filter out the issues as open, resolved, unresolved, and show all issues.
And this would display only the issues which belong to that status selected.


How to import and export issues in Sales Assessment?
You can import or export the issues in Sales Assessment.
Steps to import:
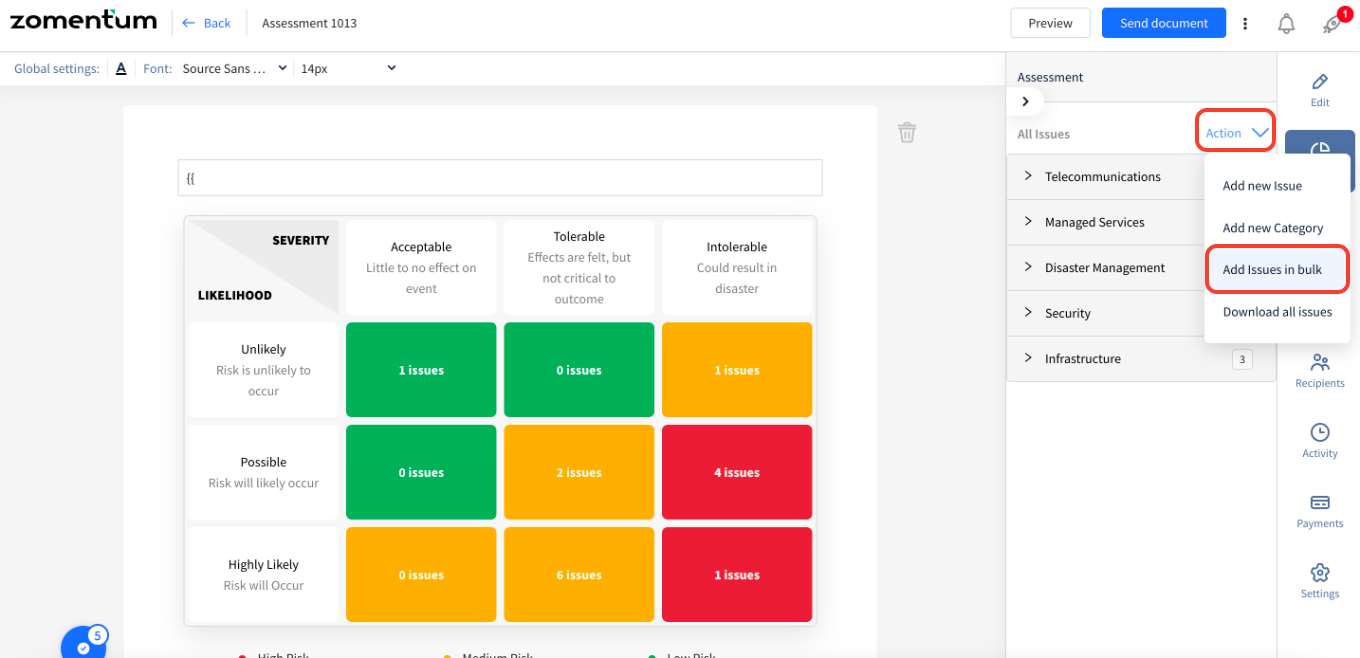
Click on Action

Click on Add Issues in bulk
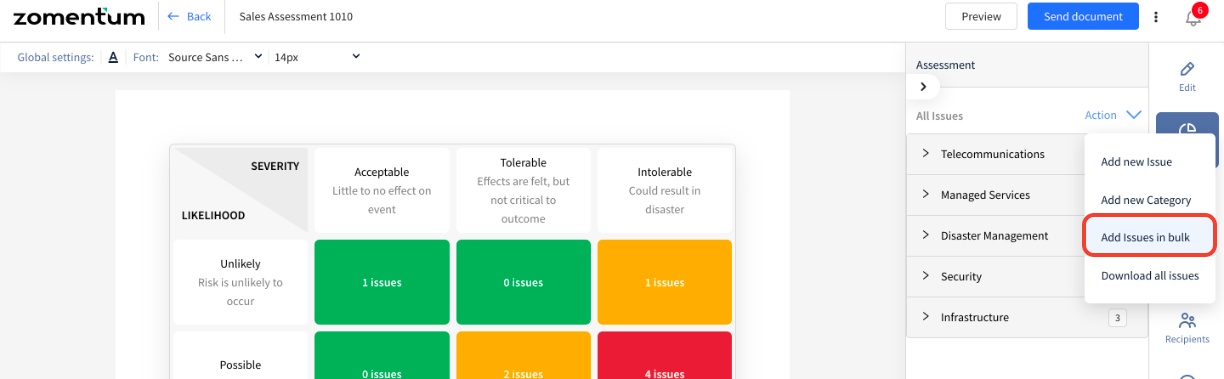
You can download the template for the issues in either XLSX or CSV format
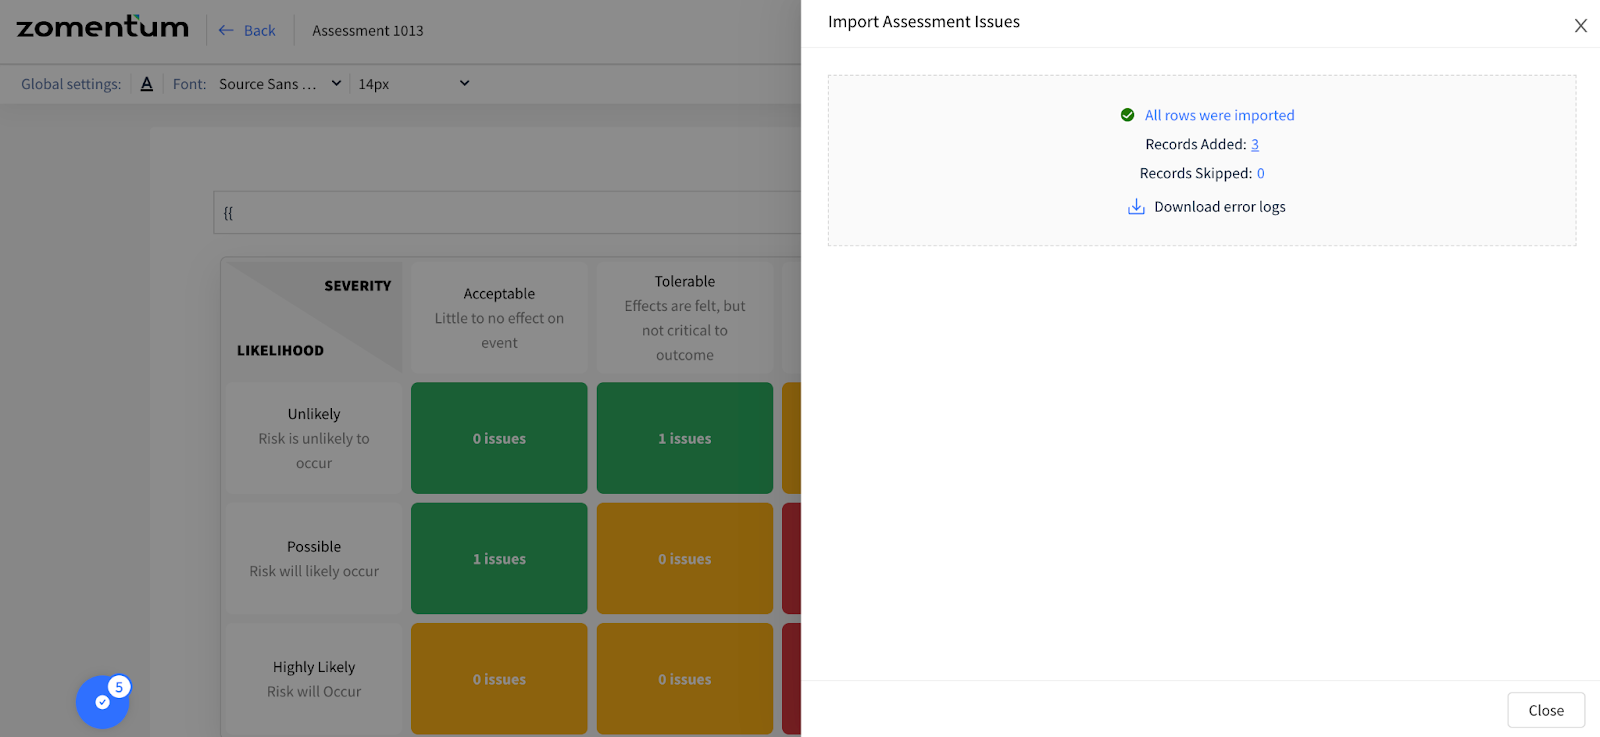
Once your file is ready, you can click on Upload
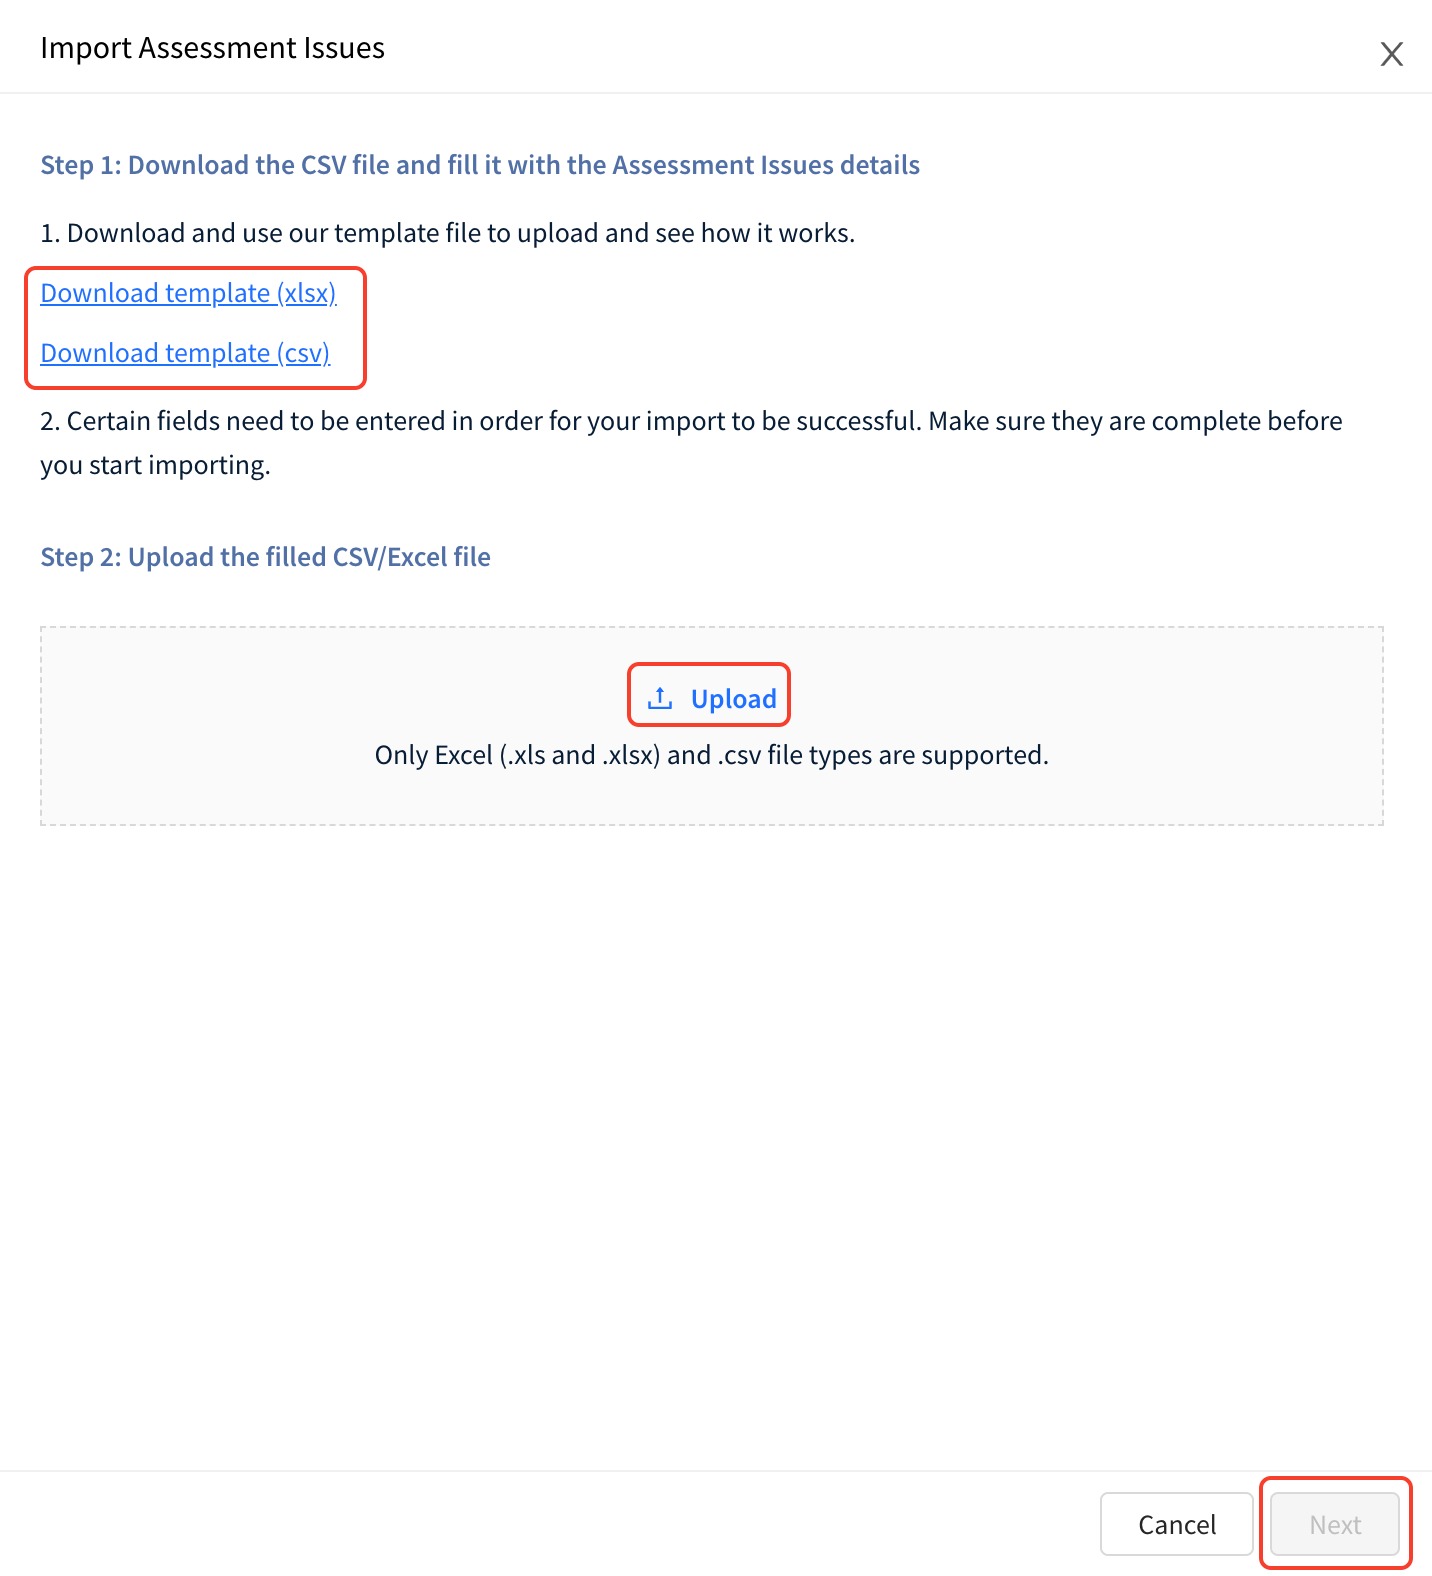
Once your file is uploaded, you will see the “Upload Completed” message.

Click on Next to complete the process. You will see the toast message if the issues are imported successfully.

Steps to export:
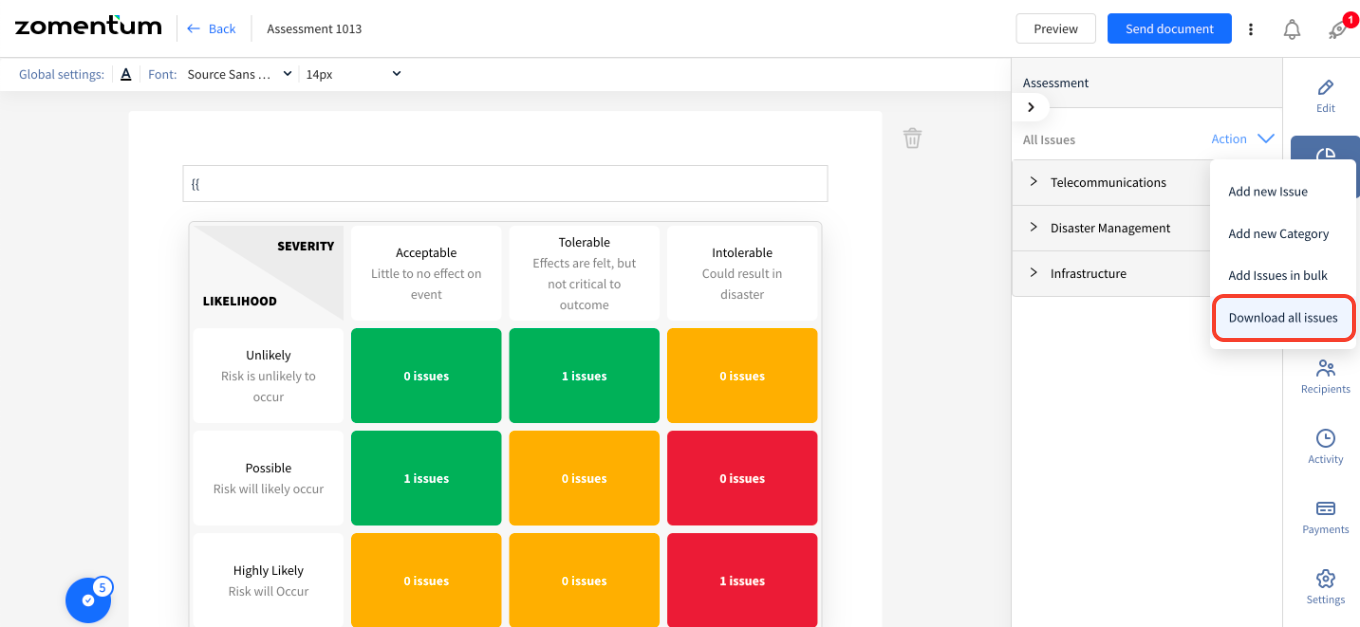
Click on Action

Click on Download all issues

Your file with all the issues will be downloaded
We now have the option to add the status of an issue under each category and display it near the Risk level. We can set it to open or resolved.
We can also drag the category block and position it accordingly.

Exporting and Importing the Sale Assessment issues
You have the option to export and import the Sales assessment issues in the sales assessment documents. The feature has been released for the users to easily export and import the issues and also for easier and quicker use.
Exporting the sale
We usually add the issues manually by clicking the Action in the Issues tab, you now have the option to “Add issues in bulk”.
How does it work?
Step 1: We provide templates to add the issues, we provide both the Excel and CSV format. The fields and values need to be added in these templates
Step 2: After adding the respective fields you need drag and drop the filled sheet in the “Upload” dropbox.
Step 3: Hit “Next” once the upload is completed.
This would automatically populate the issues you added in the template sheet into the document in one go.
Note:
1. When you hit on “Next” after upload, you would be navigated to a page called the Import Assessment issues where you have information about the upload. Whether it was successful or skipped and it also displays error logs.
2. You may have issues with the import if values are not added properly in the given template and when mandatory field values are not added.
For Importing, you need to navigate to Action > Download all issues.
You would receive a CSV/Excel sheet of the issues you have added to your document.
This feature is feasible to do bulk corrections and also for users who want to add a lot of issues in an easier way.