
Table of Contents
1. Activity Tab
2. Opportunity details
3. Clients details
4. Documents
The Opportunity Detail View is where sales teams manage everything related to a single deal: activities, tasks, communications, key deal information, and documents all in one place. This article breaks down each section of the page and what it's used for.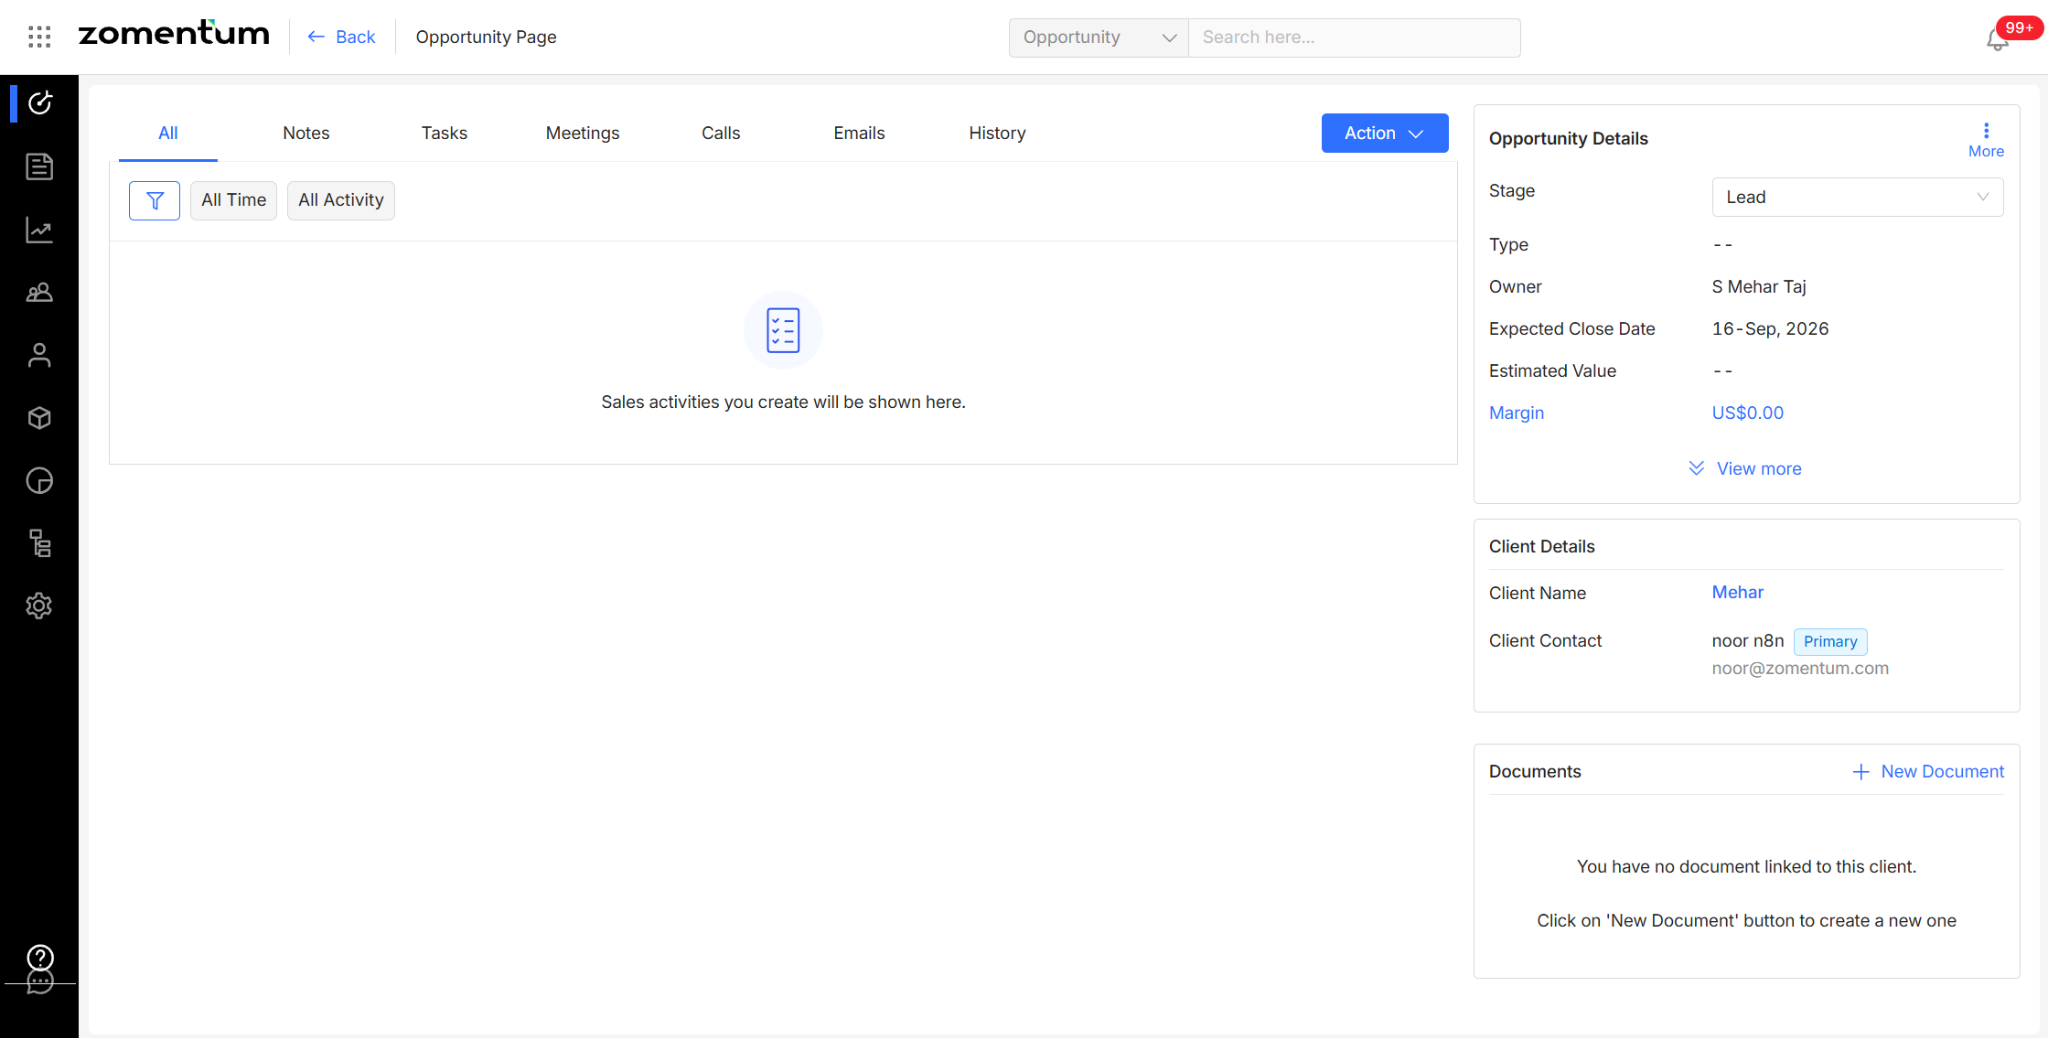
1. Activity Tabs
Across the top of the page, a set of tabs organizes all activity and information tied to the Opportunity:
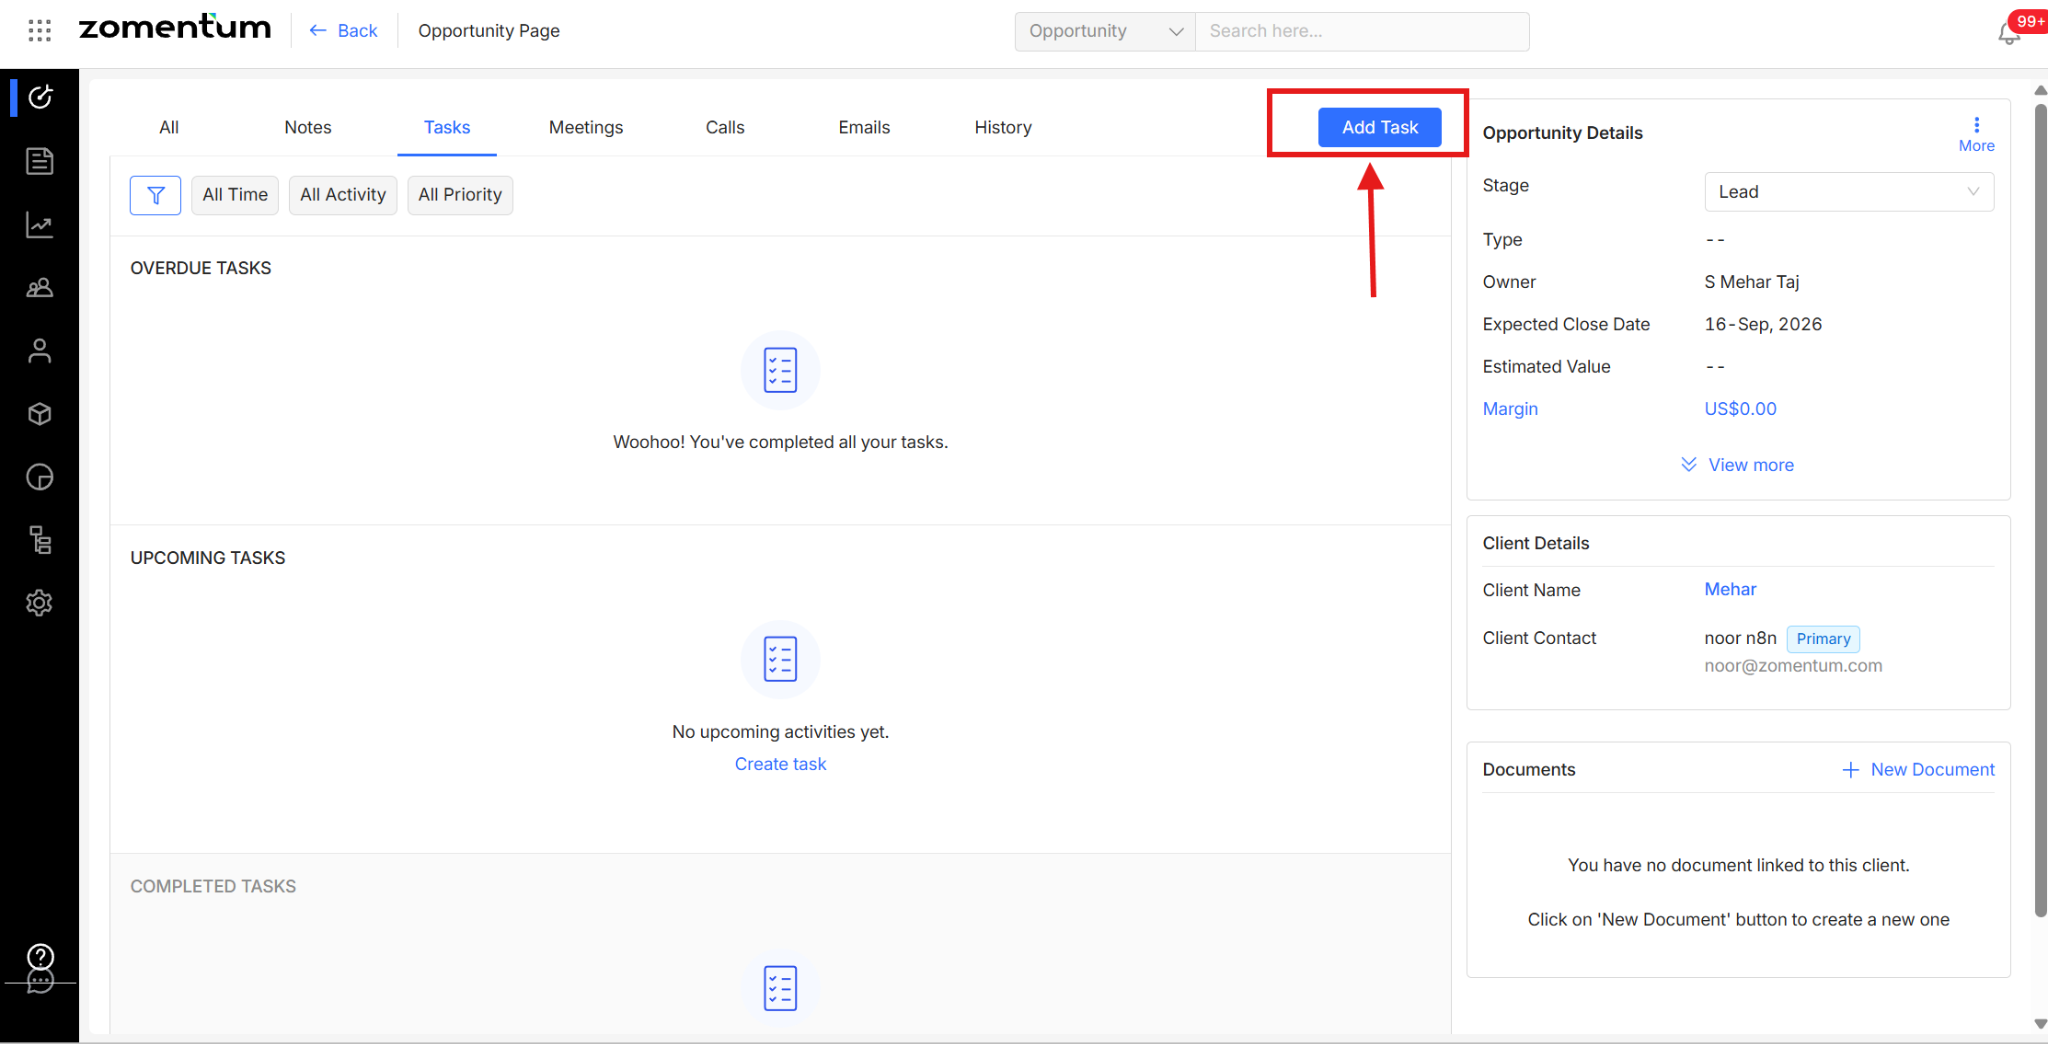
Tasks
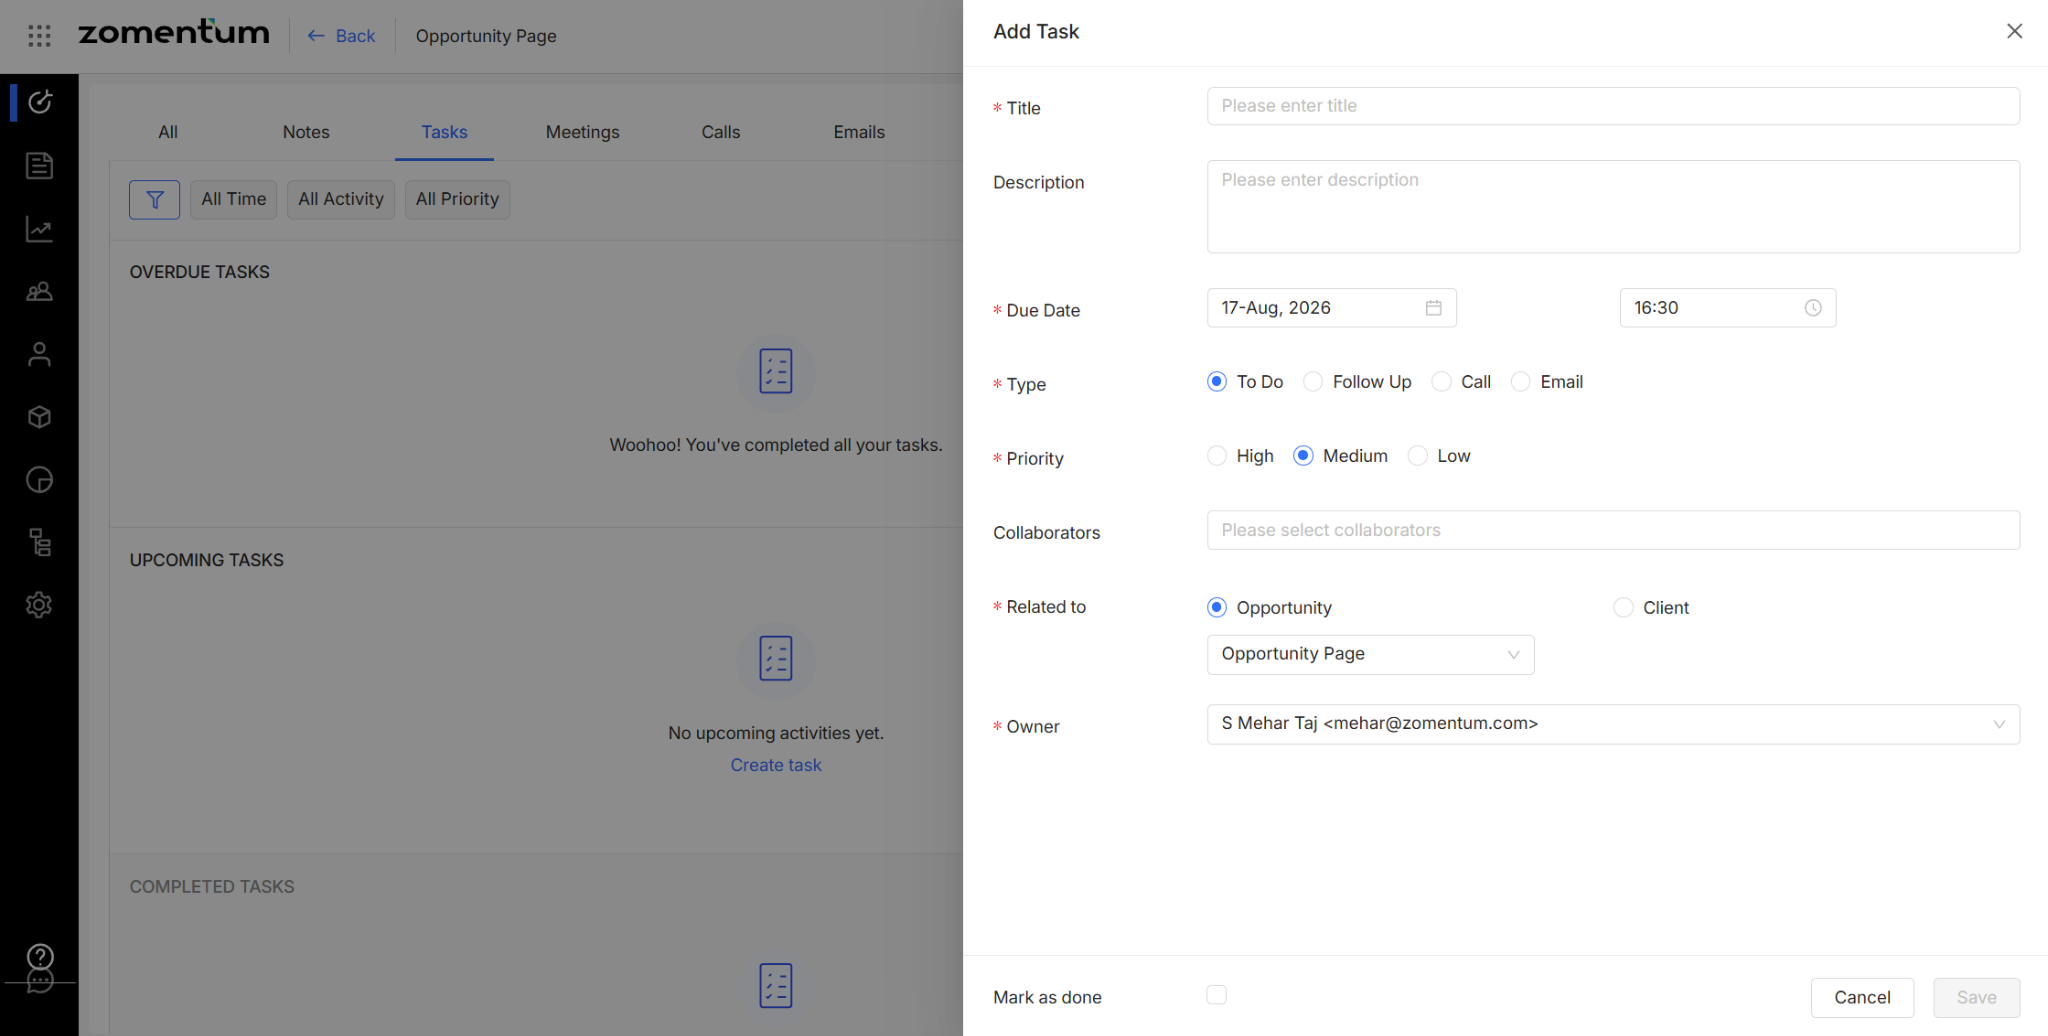
Click Add Task at the top of the page to create a new task.
Once added, the task appears under one of three sections based on its status:
Upcoming — not yet due
Completed — marked done
Overdue — past its due date
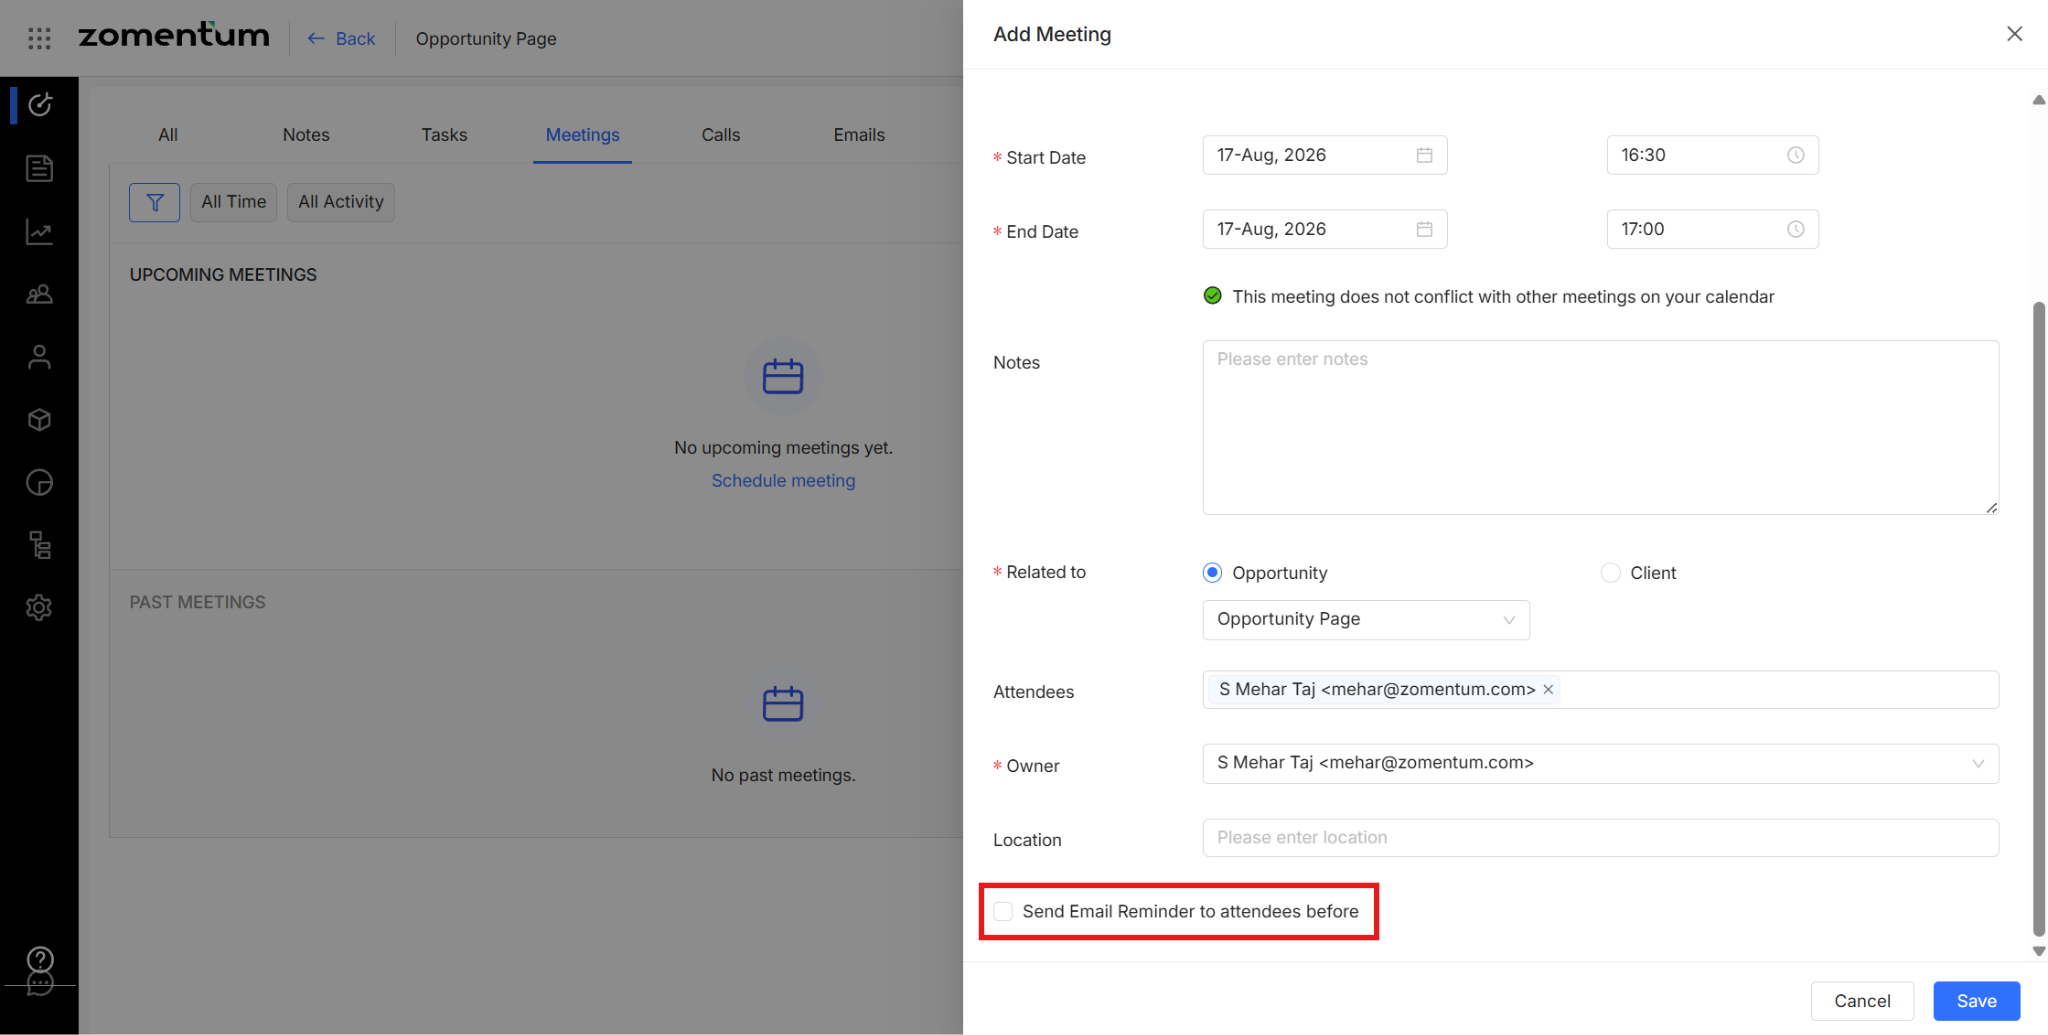
Meetings
Click Schedule Meeting at the top of the page to set one up.
You can optionally turn on Send Email Reminder to attendees before the meeting, so attendees get a reminder ahead of time.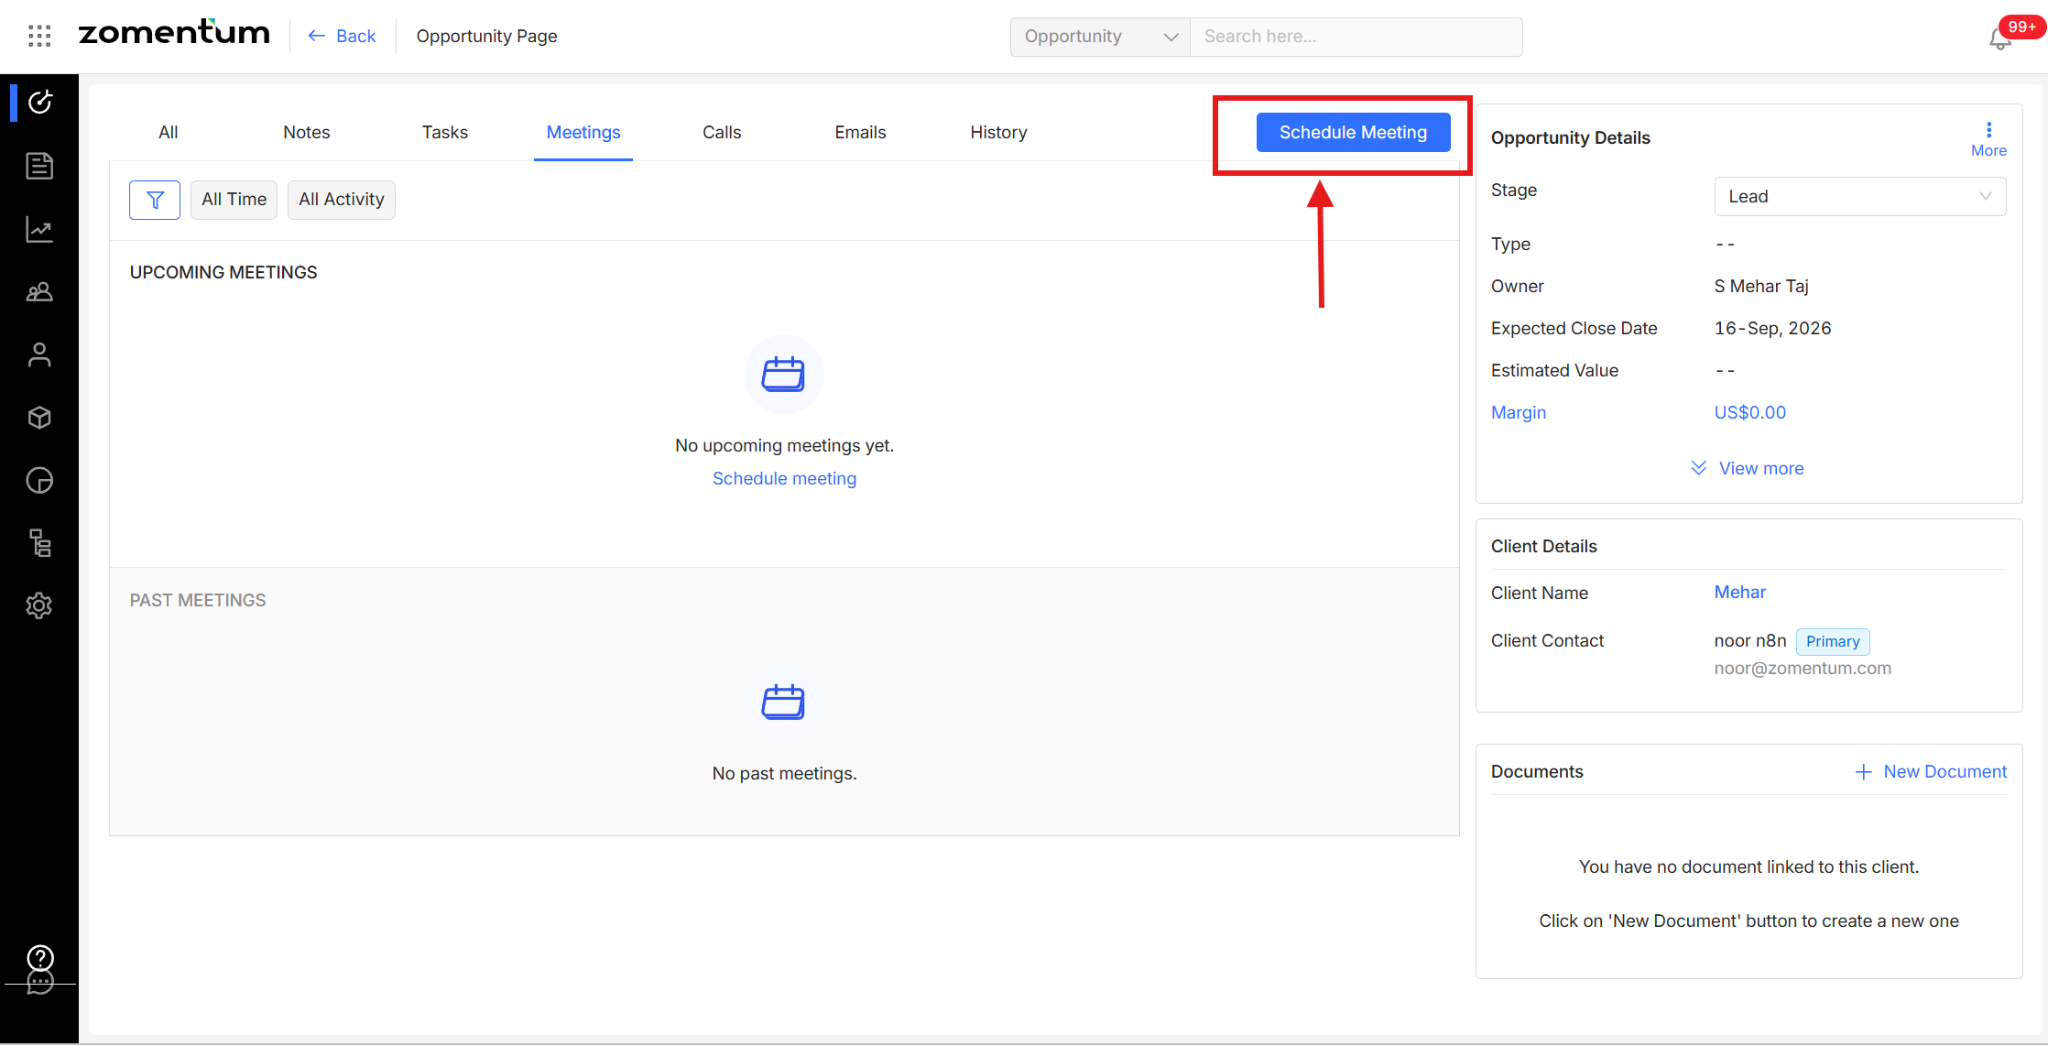
Emails
Use the Email option on the page to send an email directly from the Opportunity, without leaving the record.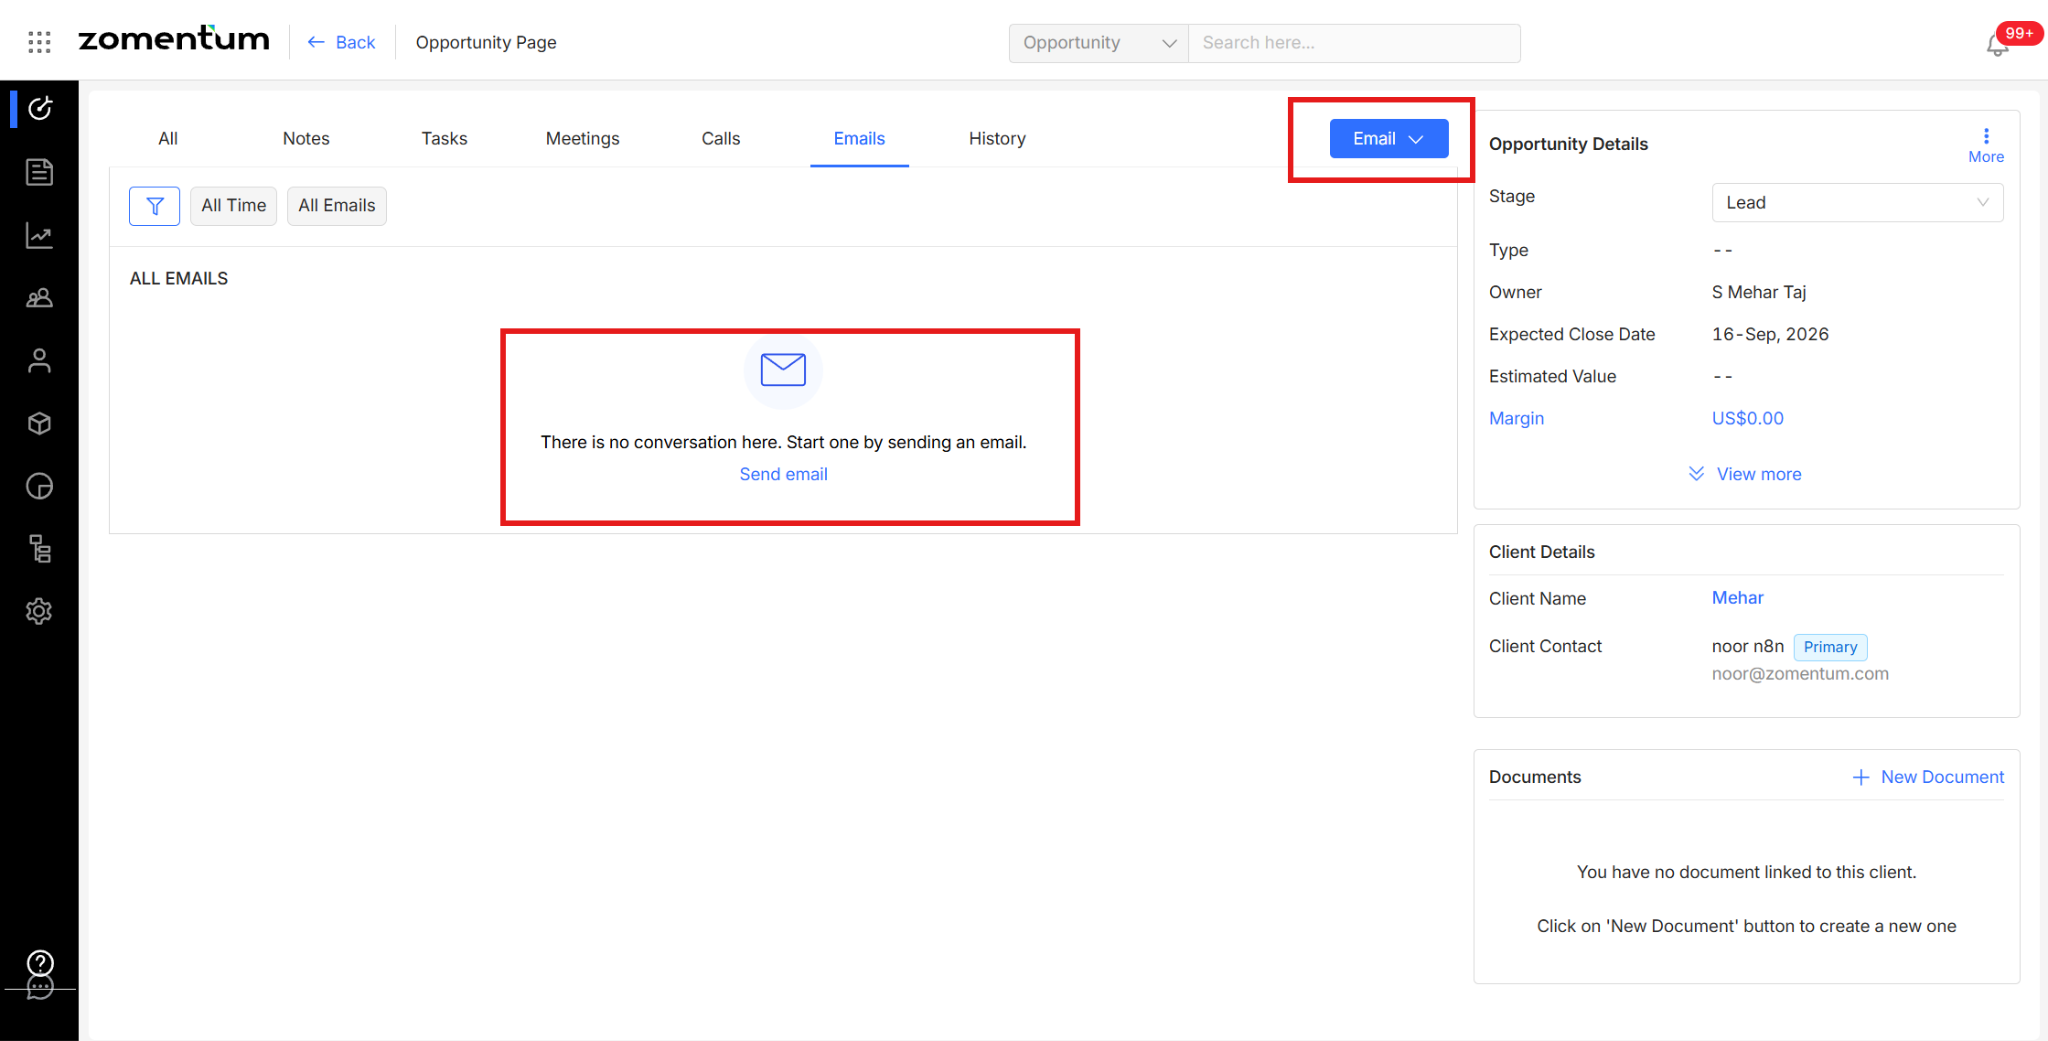
2. Opportunity Details
This section summarizes the core details of the deal: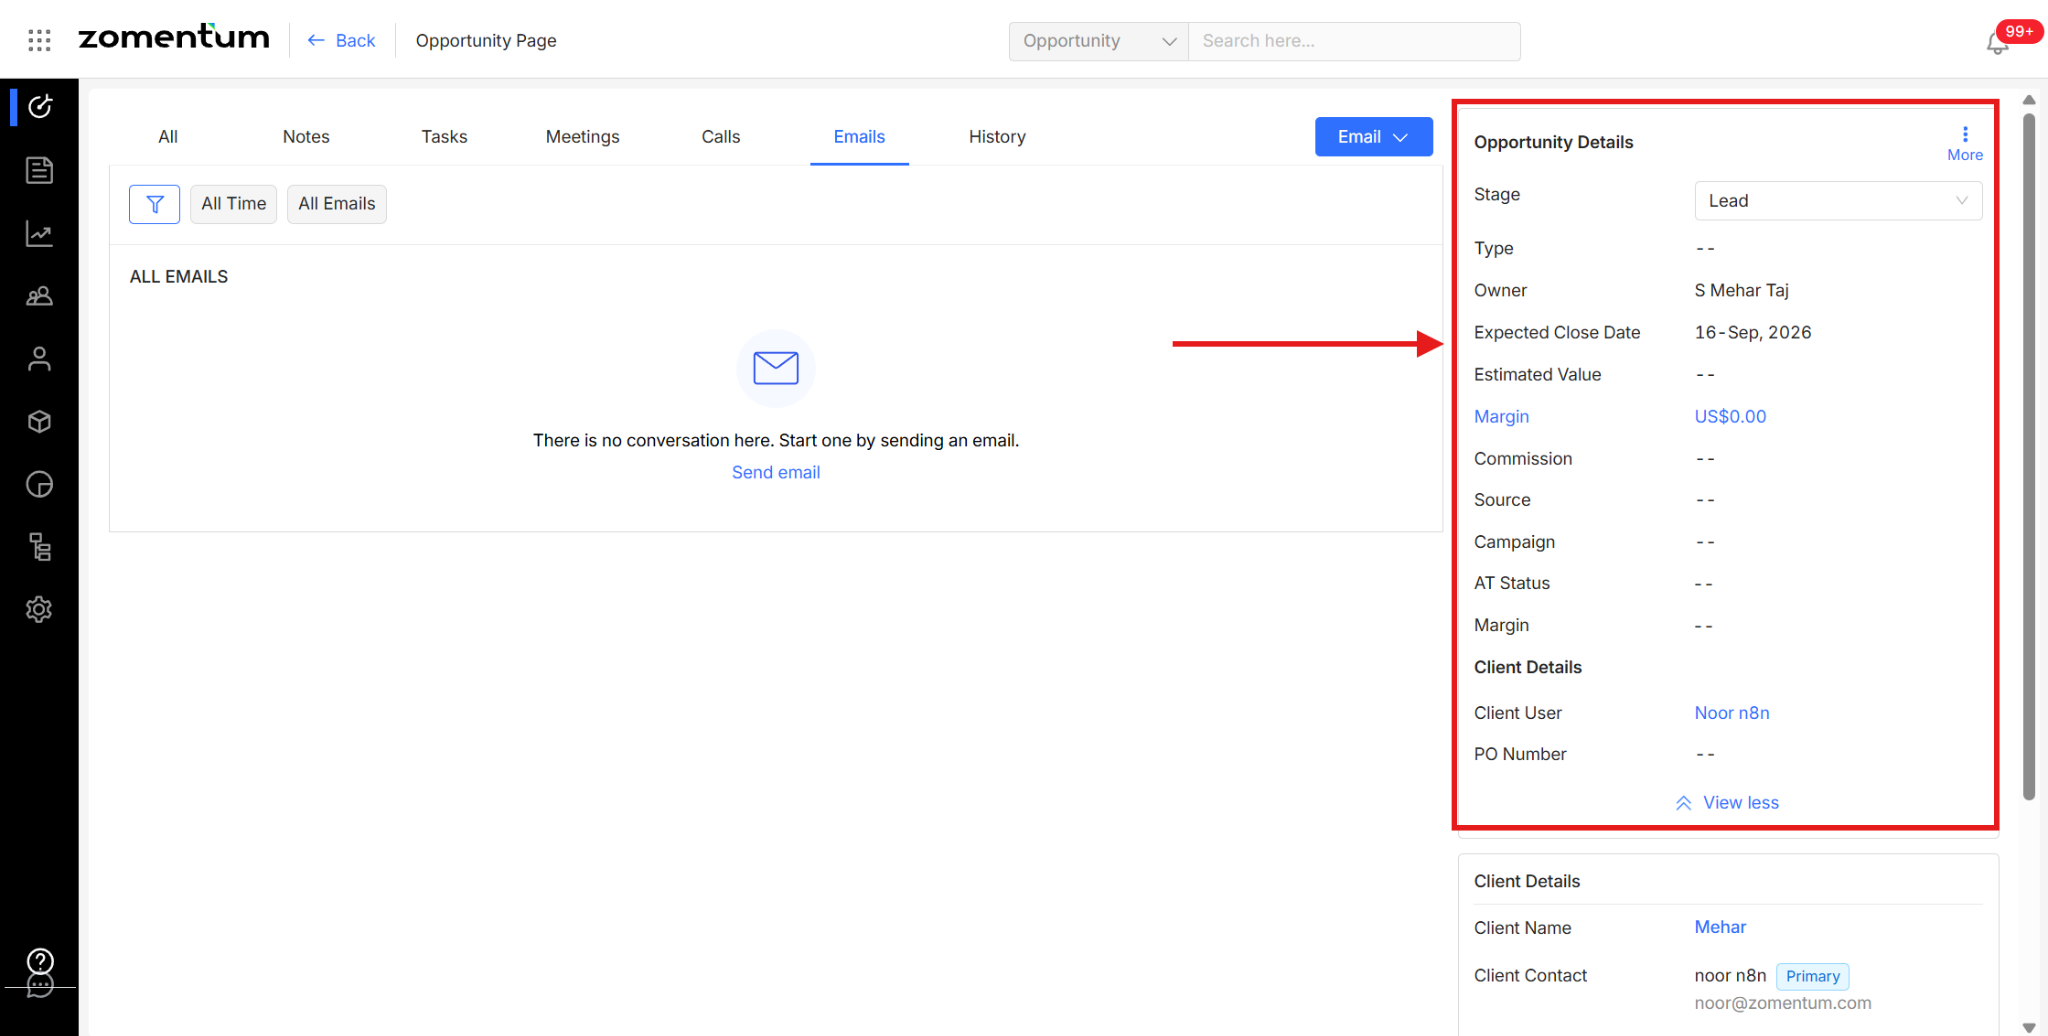
Stage — The Opportunity's current position in the sales process (e.g., Lead).
Type — The type of Opportunity.
Owner — The user or team member responsible for the Opportunity.
Expected Close Date — The date the deal is anticipated to close.
Estimated Value — The potential revenue if the deal is won.
Margin — The expected profit margin on the deal.
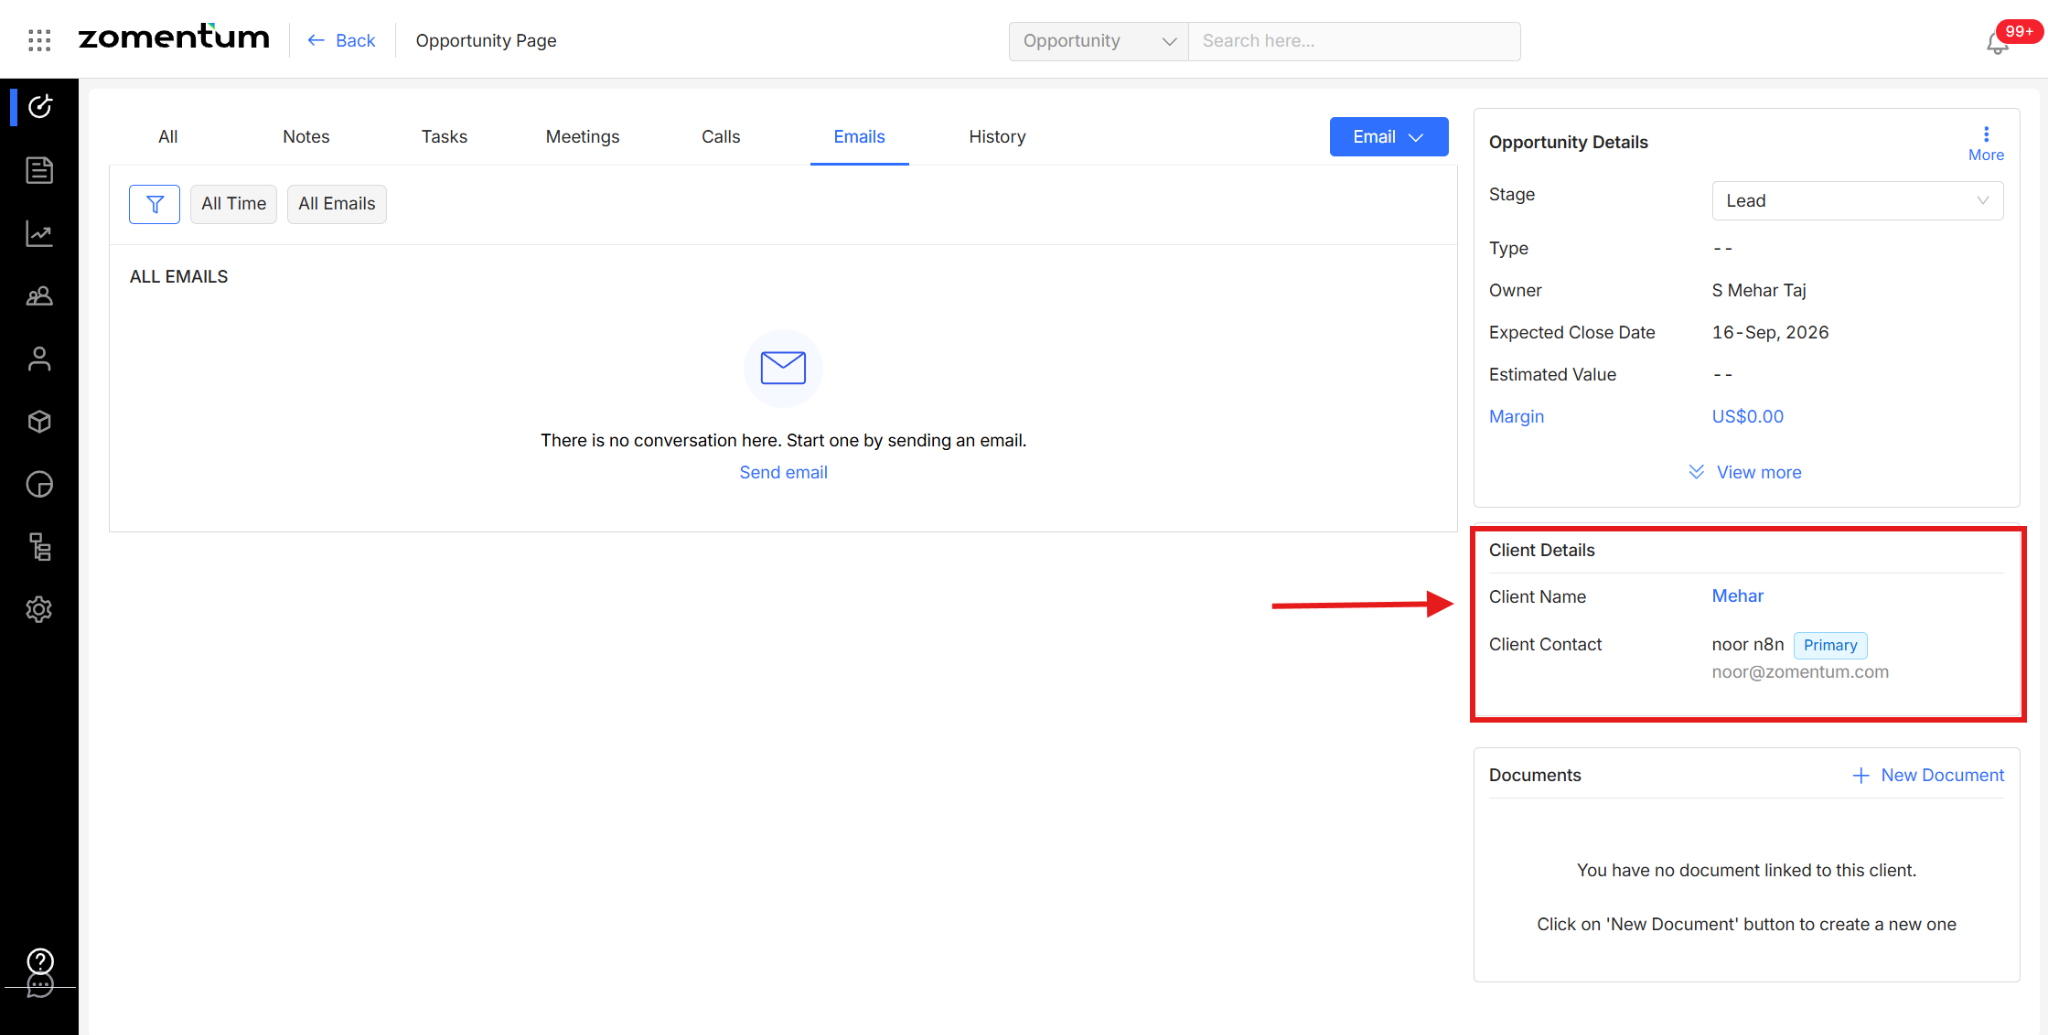
3. Client Details
Client Name — The client associated with the Opportunity.
Client Contact — Contact details for the client.
4. Documents
Click New Document to link or upload a document to the Opportunity.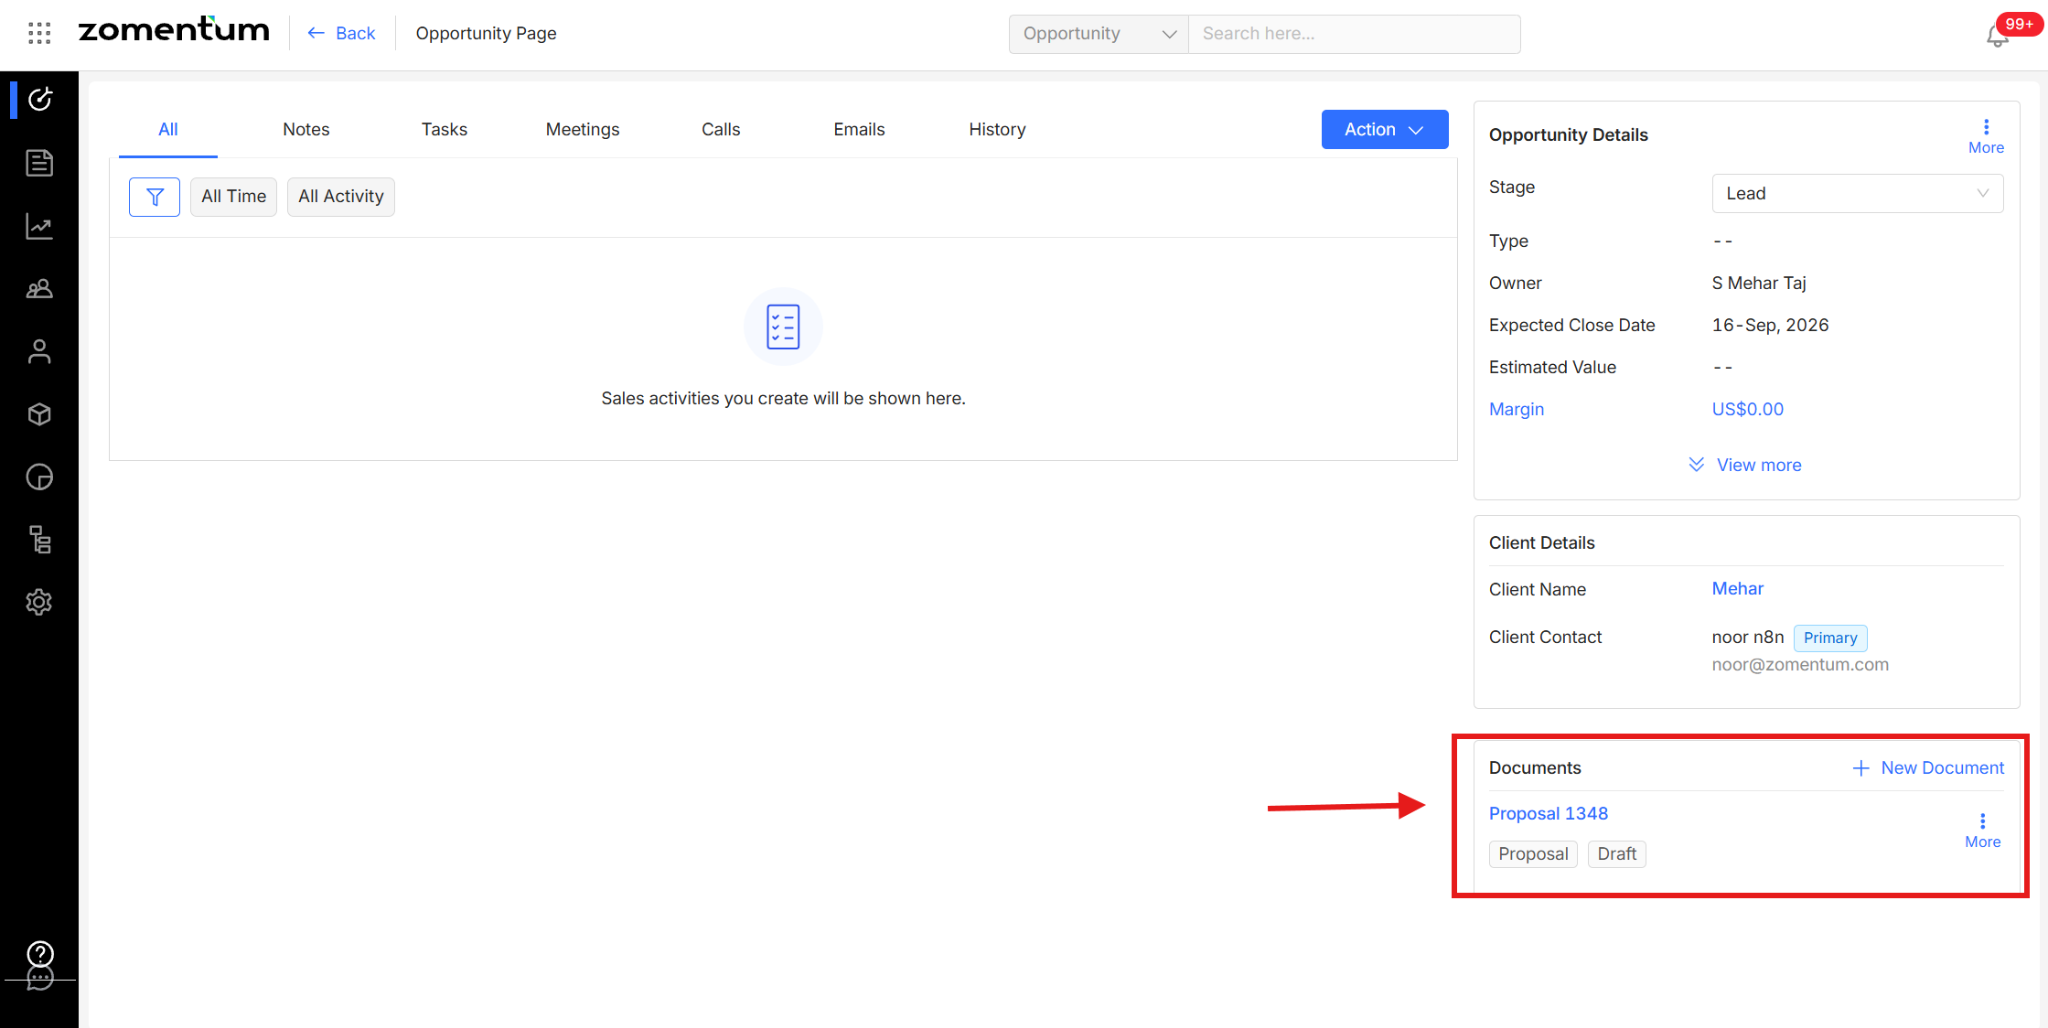
Each document has a More menu with additional actions:
Send the document
Share via link
Edit document details
Preview
Save as a new template
Clone
Download
Update status
Delete
All of these actions can be performed directly from the Opportunity Detail View — there's no need to navigate to the Documents module separately.