Looking to view your completed, chargeback, or failed transactions in separate, organized views? Or perhaps you want a quick way to identify which clients have Auto Collect enabled?
With our latest enhancement, you can now apply filters, reorder columns, and create custom views across the Transactions, Invoices, and Clients pages. These capabilities allow you to personalise your workspace, streamline your daily operations, and save multiple views tailored to your specific needs. Whether you’re tracking payment outcomes, monitoring client settings, or reviewing invoice details.
Let’s take a closer look at how you can use these new features.
Transactions Page:
Navigate to the Transactions module on the left navigation menu and click on the funnel icon to open the list of filters. Select your desired filter from the list, set the condition, select the value and click on Apply. 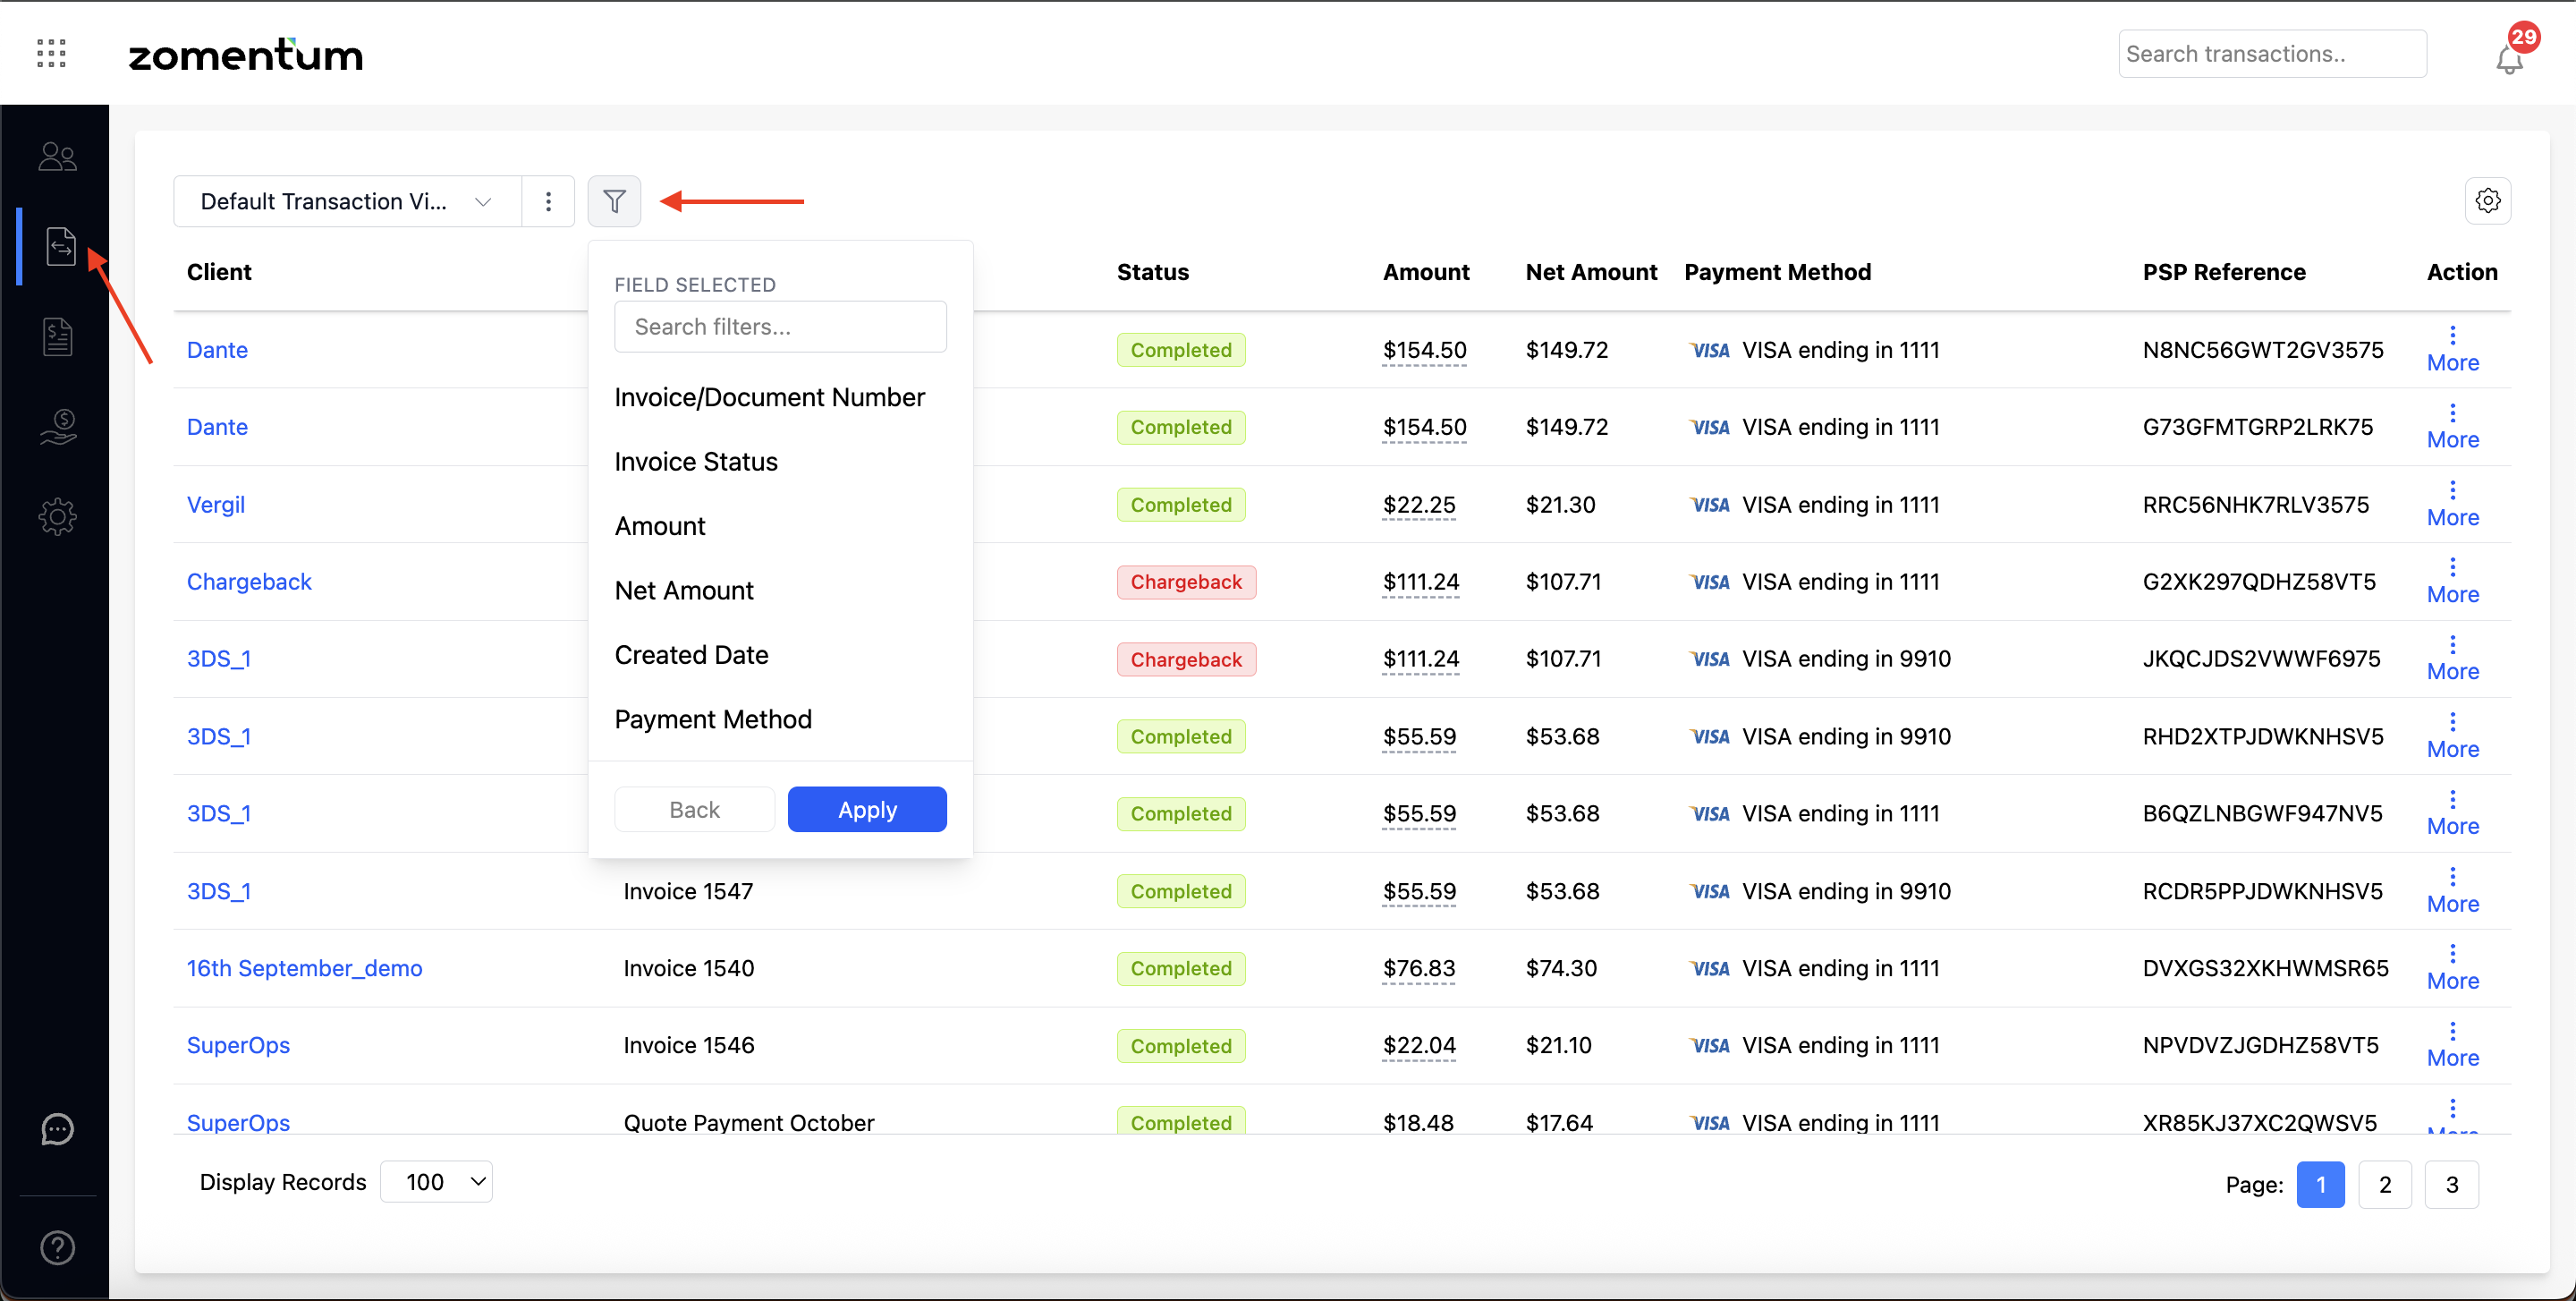
Once the current filter is selected and applied, you may choose to apply more filters by clicking on the funnel icon and selecting each filter separately. To reorder the columns, navigate to the gear icon on the upper right corner below the search box and add/remove columns and reorder them using hamburger icon beside each column. 
To save the view, click on the blue dropdown beside the Default Transaction View and click on Save View As. You can name the view as per your requirement and click on OK. Each view needs to have a unique name as no two custom views are allowed with the same name. 

If you open a custom view, make further changes in column reordering or apply newer filters, you will be prompted with a floppy disk icon (Save View) option to saventhe changes in the current view. 
Clients Page and Invoices Page:
Similarly you can apply filters, create custom views, edit and update custom views, reorder columns, rename views and delete custom views on the Clients page as well.
